Full Length
My 2024 Christmas Gift Guide
I decided to throw together a Kottke inspired 2024 Christmas Suggestions style of list. No real rhyme or reason, just things I love or that interest me.
I’ve categorized them based on area/location of life.
On Your Person
I’m a big EDC person and have put countless hours into research and testing of hundreds of products. If you’re an experienced EDC type, you’ll know about some classics folding knives (pocket knives) like the Sebenza (high end), Bugout (mid-range), and Cadet (budget). All are great gifts depending on budget. But that cadet is the sweet spot for gift giving.
A good pen is often overlooked and misunderstood. Don’t sleep on the Zebra F701. Or up the budget and grab a Tactile Turn Bolt Action. My personal favorite is this Spoke Design beauty.
For a wallet, the often sold out Tom Bihn Nik’s Wallet is fantastic. I’ve seen a lot of people suggesting the Chum’s wallet lately as well.
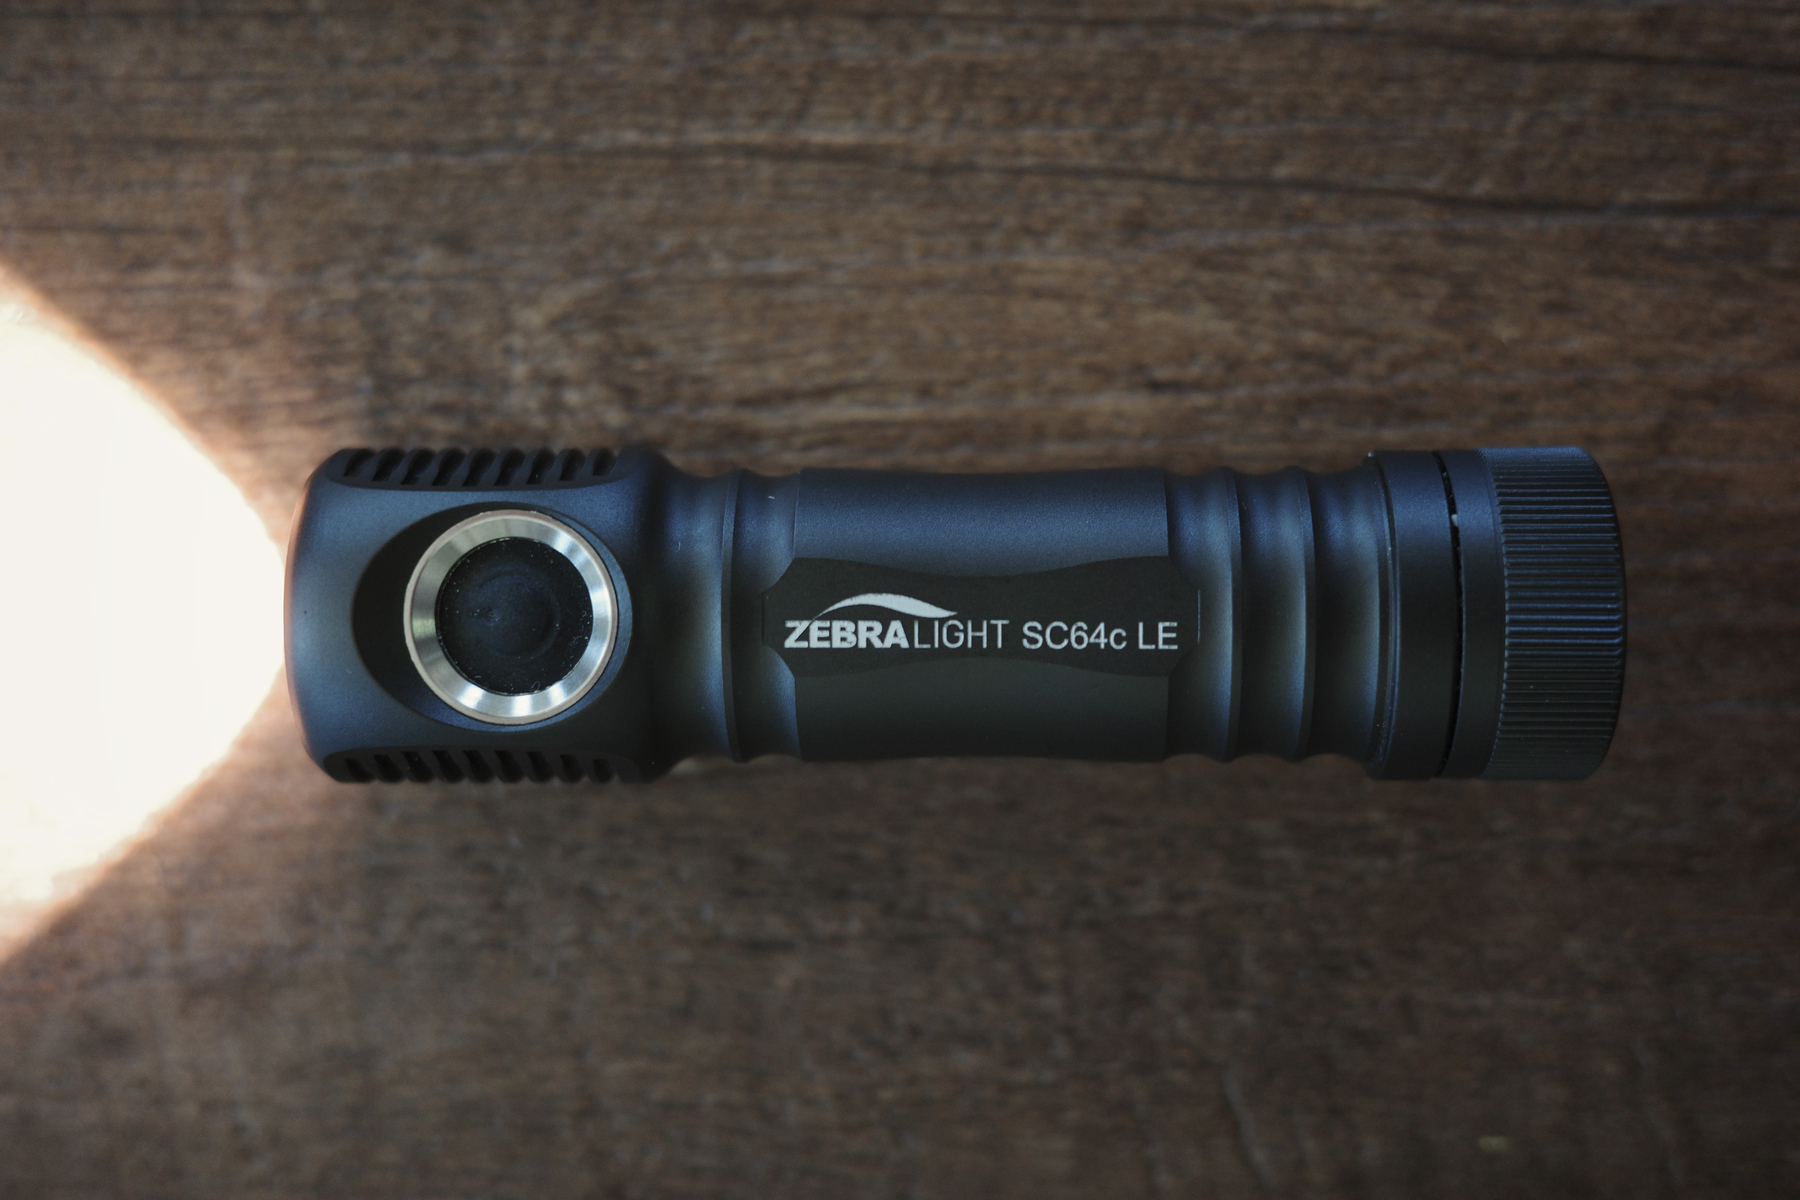
If you want to carry a quality light, a Malkoff or Zebralight are my two favorites. Avoid Olight and Nebo, in my opinion. You can do better than Fenix, but they’re not bad.
Put a SAK classic in your backpack, your desk drawer, or other places that make sense. And don’t forget an excellent pair of Roka sunglasses ($50 off with link).
In Your Office
I’m not going to suggest computers/devices here as that could go a million different directions. Instead, I’ll suggest things like this TwelveSouth desk pad, this Audio Texhnica mic for Zoom/Podcasts, and these shockingly great Moondrop wired headphones. Did you know you can turn wired headphones into some of the best Bluetooth headphones?
A postal scale and shipping tape dispenser are great for those who ship frequently. Also, use PirateShip for the best prices and experience.
If you’re going to be sitting for hours a day in a chair, it’s important to get a great one. Steelcase Leap and Amia are two of the best.
For a desk pen, a Studio Neat Mark One or Lamy Safari are excellent choices. Studio Neat’s PanoPad is a game changer for a notebook.
In Your House
I’m excited about this Anker battery/dock for our house. Gives us a central place in our home to charge phones and other devices, but also can be picked up and used elsewhere when needed (like the kitchen island). Anker also has these excellent dual USB-C charge cables that I love.
TwelveSouth has my favorite bedside dock.
This tea kettle is fantastic. We’ve used it multiple times a day for years without issue. My wife grinds her own coffee every morning with the excellent Oxo Grinder. She’s been a Chemex person for years but recently grabbed a Moccamaster.
I love my Synology router. I use a Mac Mini to power our Plex Server (I suggest a Plex Lifetime membership). For hard drive space, I use 2 of these Toshiba drives in a Sabrent dock. We have an antenna for free OTA channels.
In Your Vehicle
Grab a Leatherman for your vehicle. They’re better than the similar versions you see in random checkout lanes. And incredibly useful at times when you really need it.
If you have a compatible vehicle, the Bulletpoint Mounts are better than everything else I’ve tried.
This SAK fingernail clipper thing is so good that almost everyone in my family now has their own either in their vehicle or on their keychain. Speaking of keychains, you need an AirTag.
If you have kids, these oversized window mounted cup holders are so convenient. For trips, we use these iPad mounts.
Random
These Ryobi loppers save so much of your time and energy. The classic G-Shock is hard to beat for value. Rechargeable batteries are so convenient. You also need to organize your batteries.
The MagSafe Popsocket is a winner. Flint and Tinder jeans are my new favorite. Their Waxed Trucker Jacket keeps me warm. Flux tennis shoes are my everyday choice. As for boots, these Jim Green’s are incredible.
The Logitech MX Master 3S is suggested everywhere for good reason. Field Notes are so useful. Future proof your device charging with this insane 240W USB-C cable for an excellent price.
Apps/Services
Omnifocus 4 takes the title as my app of the year. It has a steep learning curve, but is worth diving into as a ToDo app. Features like defer dates, recur upon completion date, and custom perspectives catapult it above the rest.
——
That’s a look at my recommendations for the 2024 Holidays. If you have any specific suggestions, let me know. Merry Christmas!
The Sustainability of Theme Development on Micro.blog
Originally, Tiny Theme for Micro.blog was simply a personal project for my blog. After I went live with it, I began to receive requests to make it available to others. I had no objections to people using my work in this way, so I did the necessary work to make it as useful to others as it was to me.
From day one, the response was incredibly positive. It received what I consider a high adoption rate and more and more micro.blog users installed it as their theme of choice. Support and tutorial requests started to roll in, but nothing I couldn’t handle at the time. Honestly, I enjoyed helping others accomplish their goals for their sites.
Eventually, I released another theme, Sumo, for the platform. Again, it has received positive reviews and been used by more people than I could’ve imagined. What started as a personal project morphed into an unexpected design customization hobby. While I do enjoy the work, I noticed more and more of my time was being devoted to designing and developing freely available blog themes.
At a certain point in the process, I knew I’d have to figure out a way to monetize it. This isn’t ideal, but when you’re spending hours and hours on a project, at some point it has to make financial sense. There are expenses that I incur relating to hardware, software, hosting, and of course time. I needed to at least cover some of those costs. This lead me to introducing a simple Buy Me a Coffee monetization structure. Basically, you get everything for free and if you can afford it, buy me a cup a coffee1 from time to time.
The generosity of others has always amazed me. In this case, there have been a few who have been more than willing to help offset expenses. It’s hardly profitable, but it has enabled me to at least cover a few costs over the last year. The total amount of donations I have received over that time is $532.73.
Here is the monthly (13 months) breakdown:
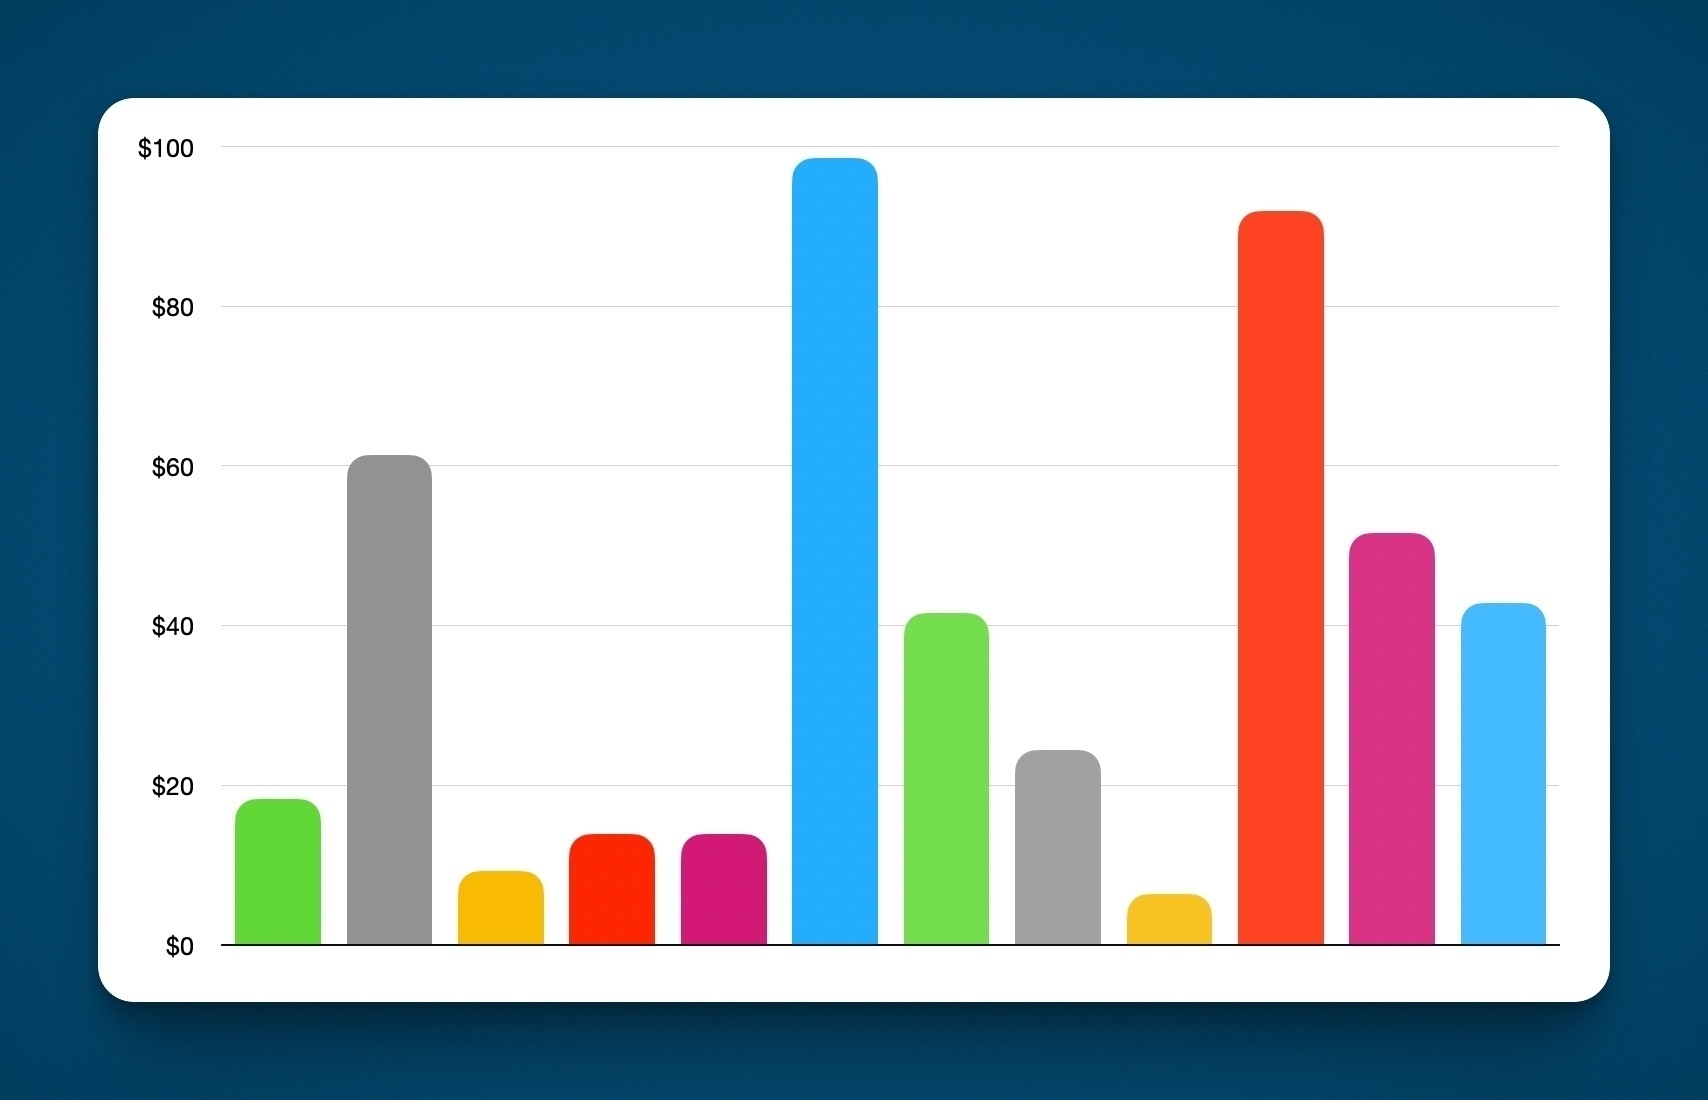
As you can see, things fluctuate greatly. The peaks in the chart are always connected to helping an individual user with a larger customization issue. The minimal values are typically propped up by a few automatically recurring donations. These donations have covered the cost of my preferred coding software, design software, Micro.blog hosting, and a few cups of coffee. That’s been fantastic.
The uncovered aspect is, unfortunately, time. To be clear, this isn’t the fault of users or of the Micro.blog platform. It’s simply a byproduct of a hobby based design/development project. There aren’t many people making simple blog themes that provide large weekly cash drops. It’s the nature of the beast.
With Micro.blog being a few years old at this point, I would still consider it in its infancy. Manton and team have done an incredible job developing a platform with many strengths and possibilities, and I know they have ambitious plans for the future.
However, as someone who is simply designing a theme for the platform, I must find a way to prioritize my time and resources in a way that makes sense for me. That doesn’t mean Tiny Theme or Sumo Theme are going away. Not by any means. But it does mean, at least for a season of life, I have to redirect some of my time to more pressing matters.
First and foremost, that’s the well-being of my family. This year, our family received some very tough medical related news involving two individuals. This isn’t the place to get into specifics. But I will say that both of those individuals, after months of treatment, are rebounding beautifully and the future looks bright.
As for Micro.blog, I’m still a supporter. As for Tiny and Sumo Theme, I’ll still be maintaining and updating them. When it comes to support, I’ll still attempt to address any issues and provide tutorials when possible. You can feel confident that the themes will continue to exist and be supported. Timelines may look different. I once released support for a feature less than 5 minutes after Micro.blog announced it. I don’t know if that will happen again, but…never say never.
To wrap this whole thing up, I’d like to offer a few suggestions for the Micro.blog team to support and entice further theme/plugin development on the platform:
- Introduce a “verified” (or similar) category for plugins. If a theme (or other plugin) passes certain criteria, let it be viewed under a heading that indicates its quality.
- Provide discounts to proven developers on the higher paid plans. For example, a developer may not need to use a certain feature (like family plans) for their personal account. But to provide support and testing for others, it would be nice to have access to them.
- Add a link to each developer on individual plugin listings. Or perhaps a “follow” button.
- Communicate upcoming changes/features, when possible, to proven designers/developers beforehand.
- Find a way to further incentivize quality development. We’re a simple folk. I know a guy who developed an entire app for a company just for a chance to win a box of swag. T-shirts and notebooks and stickers and mugs and and and…are powerful stuff these days.
-
Yes, it says coffee multiple times. And yes, that’s the name of the company I use to process donations. And yes, most people think coffee is a live saving substance. However, I don’t drink coffee. I’ve tried so many times. From the entire Starbucks menu to every artisan thing imaginable to adding overwhelming amounts of sugar/milk/honey/syrup, it just doesn’t work for me. I’ve even tried the add salt trick to help with the bitterness. Coffee just isn’t for me. My drink of choice is a nice cold Dr. Pepper. As a Texas-born (Louisiana native) man, it make sense. Alas, there is no service called Buy Me a Dr Pepper. Yet. ↩︎
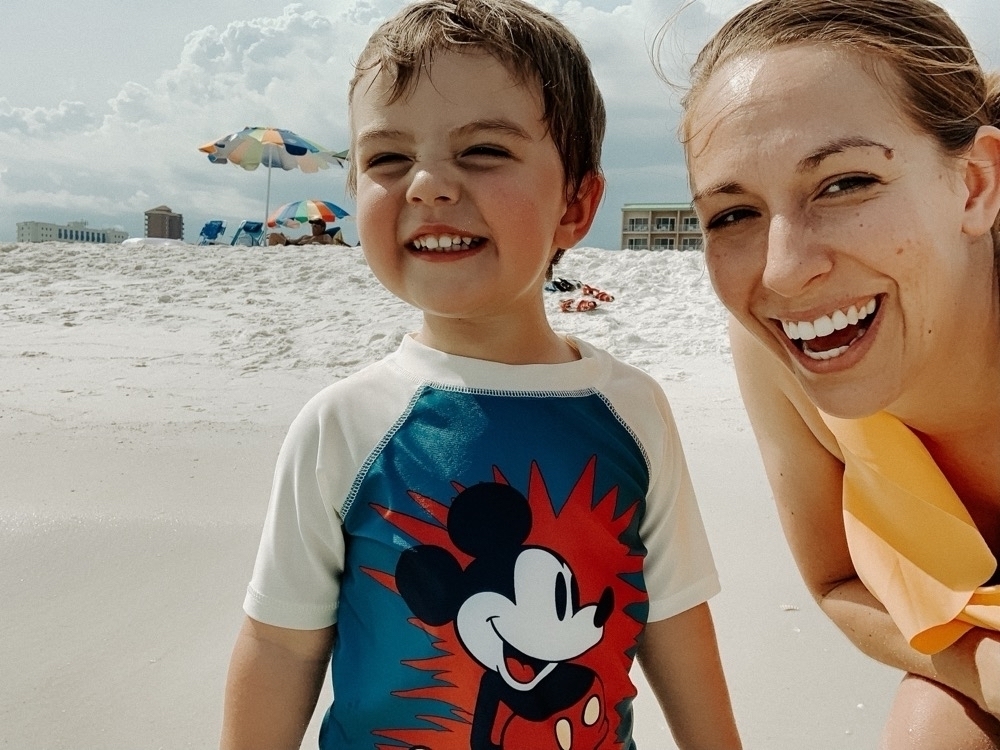
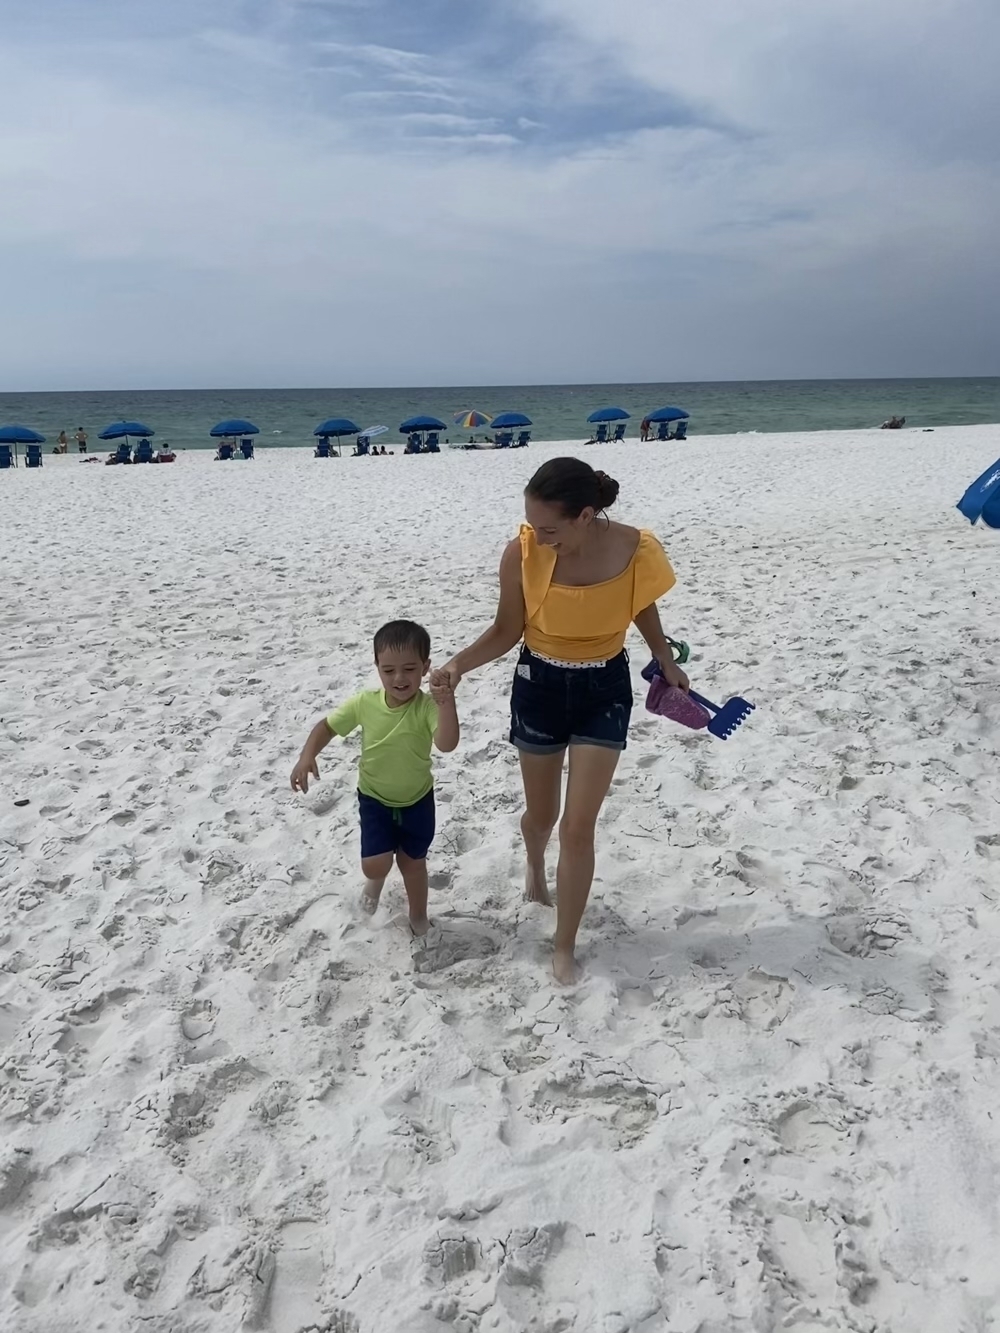
A Spontaneous Family Road Trip
After a few long weeks of health-related issues (everyone is ok), unexpected changes to plans, and a variety of curveballs being thrown at us, we decided to take a few days off for a family vacation. We did it old school style…loading up the car and hitting the road.
With Atlanta, GA, as our final destination, we began the trek. On the way, our first stop was Montgomery, Alabama, where we ate more BBQ than we should’ve (especially our 5 year old). We decided to stay the night and continue the drive the next morning.

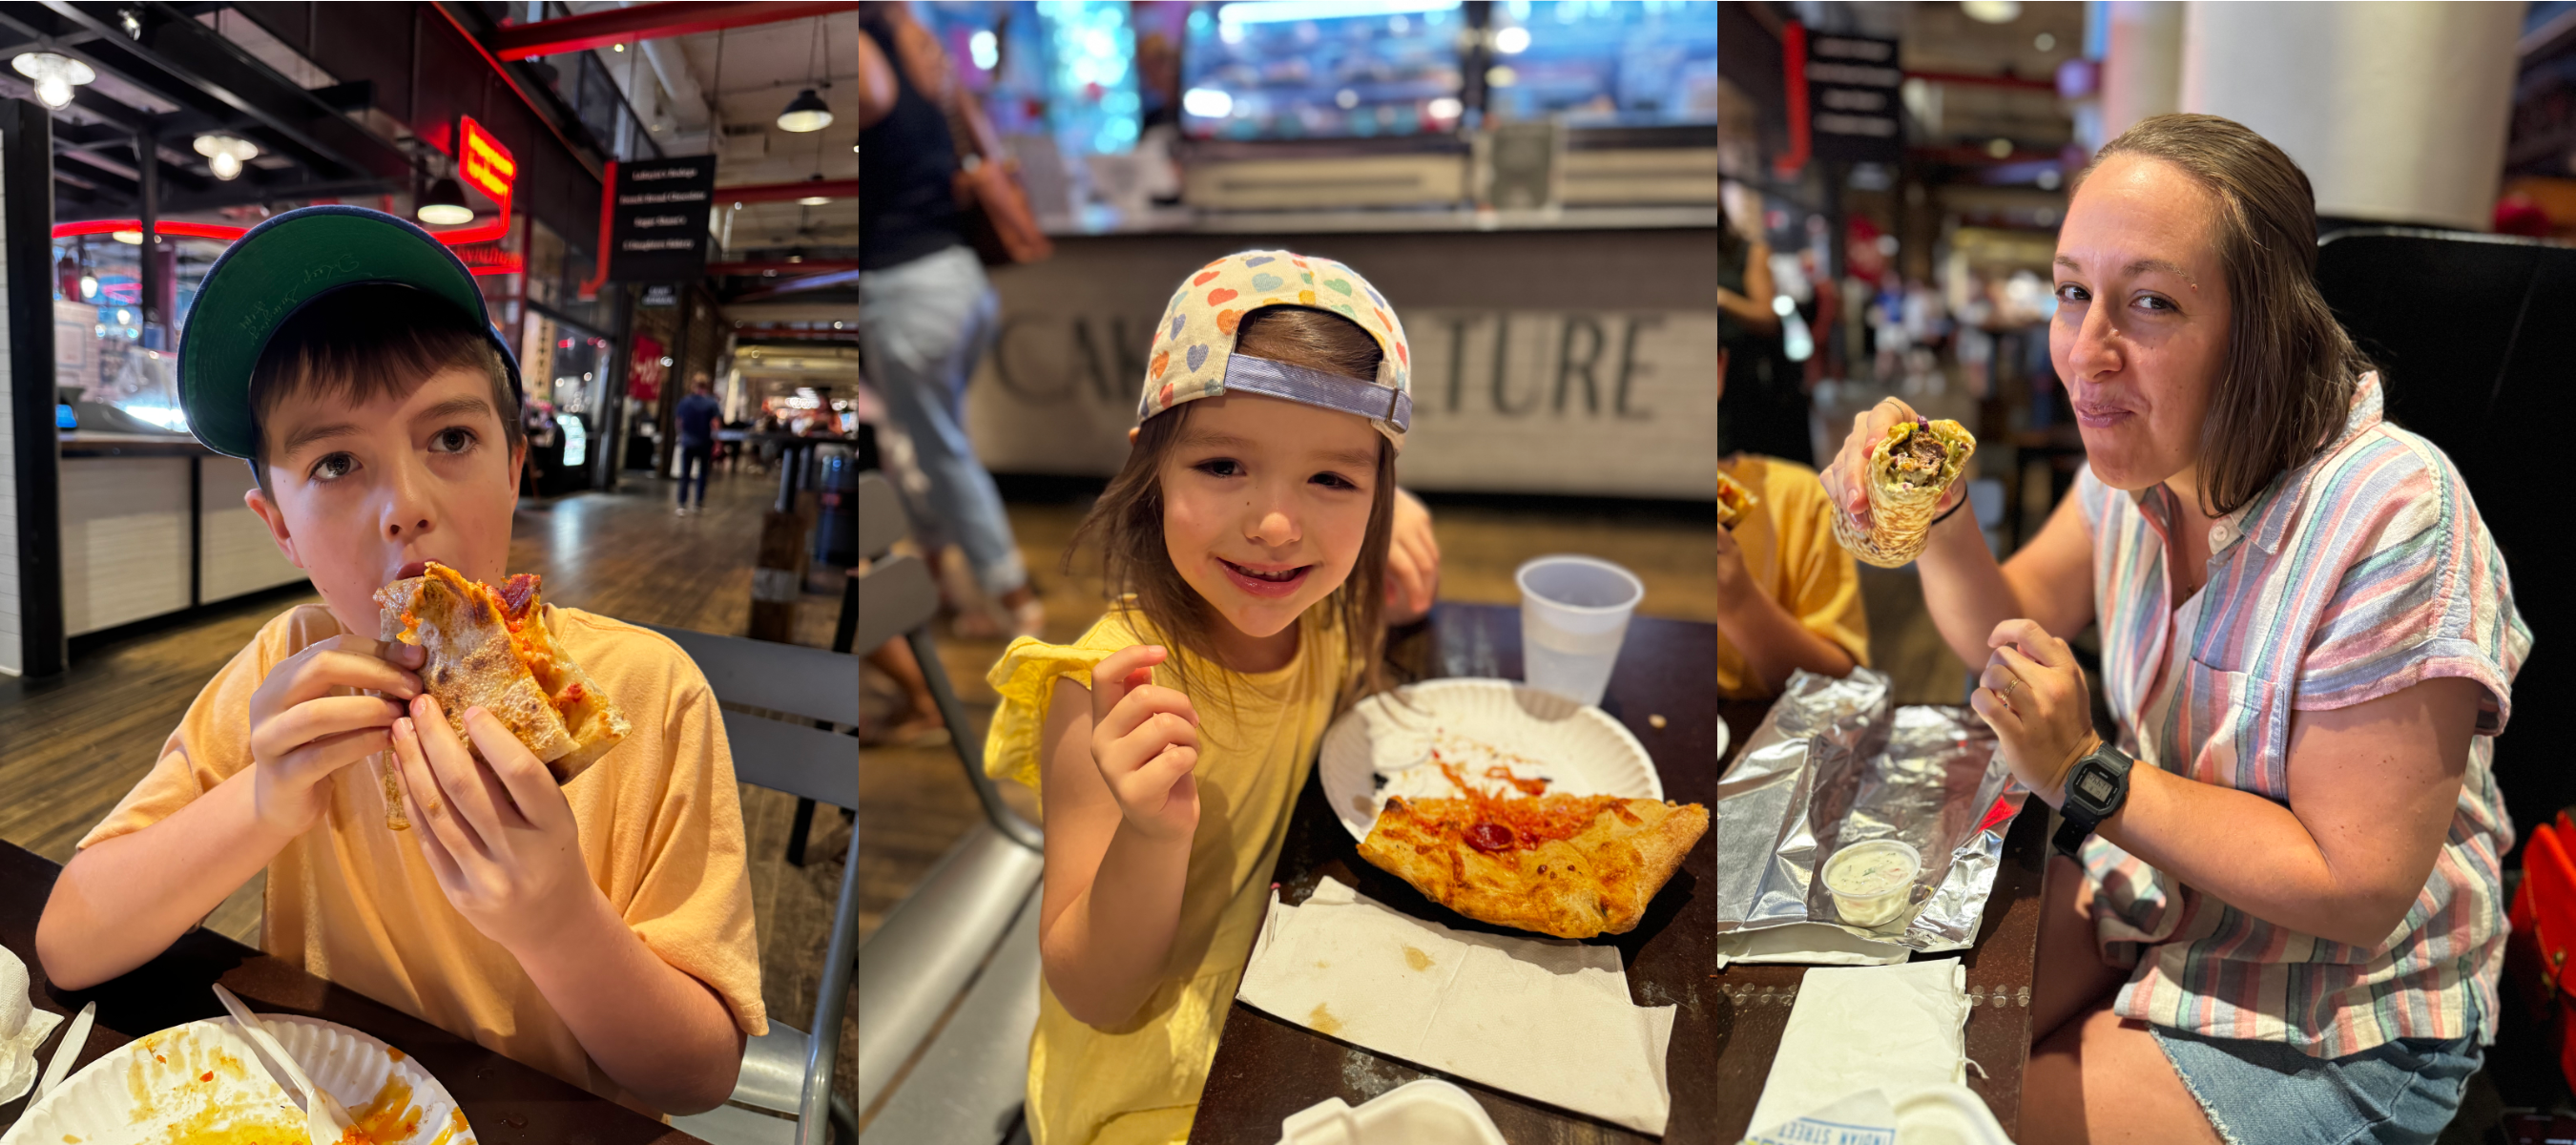
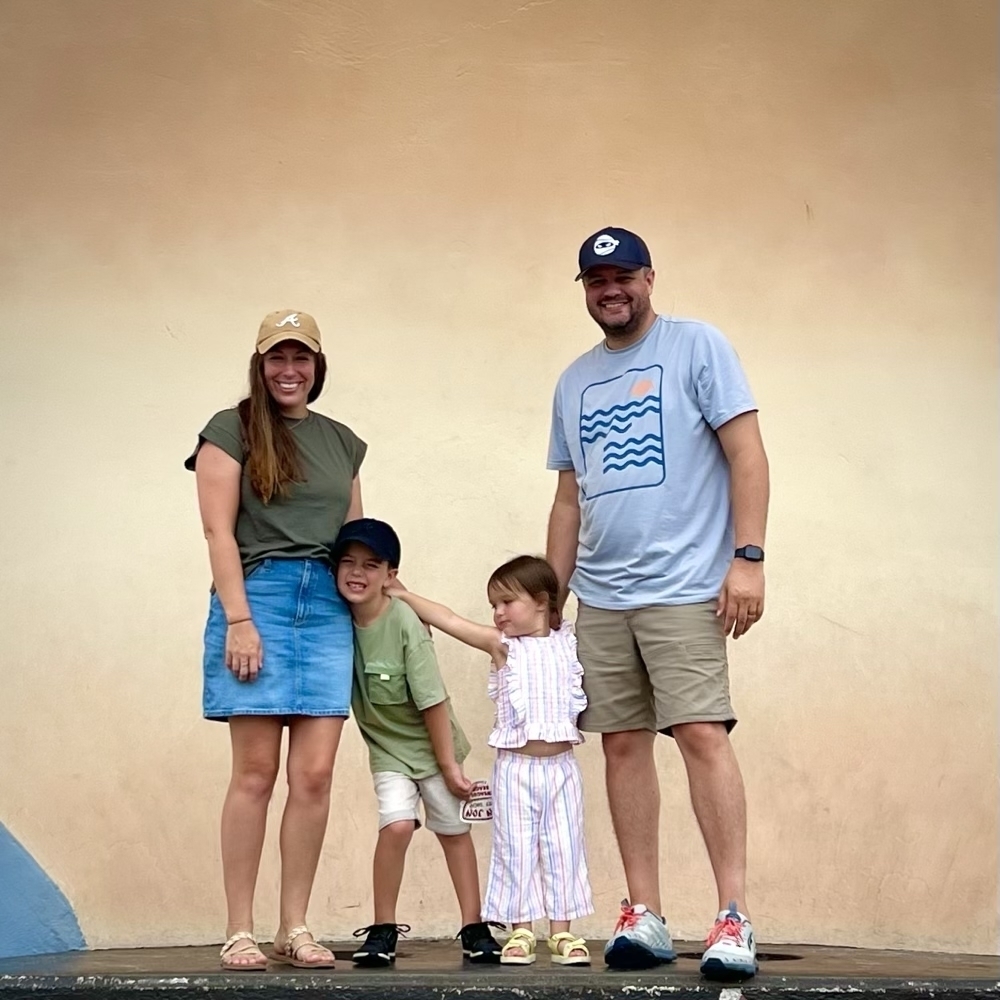
Once we made it to Atlanta, it was time for lunch. We visited the excellent Ponce City Market to kill some time, shop, and eat. I don’t think we ended up buying anything outside of lunch, but it was a worthwhile visit. The kids got pizza while Kalena and I went with lamb entrees.
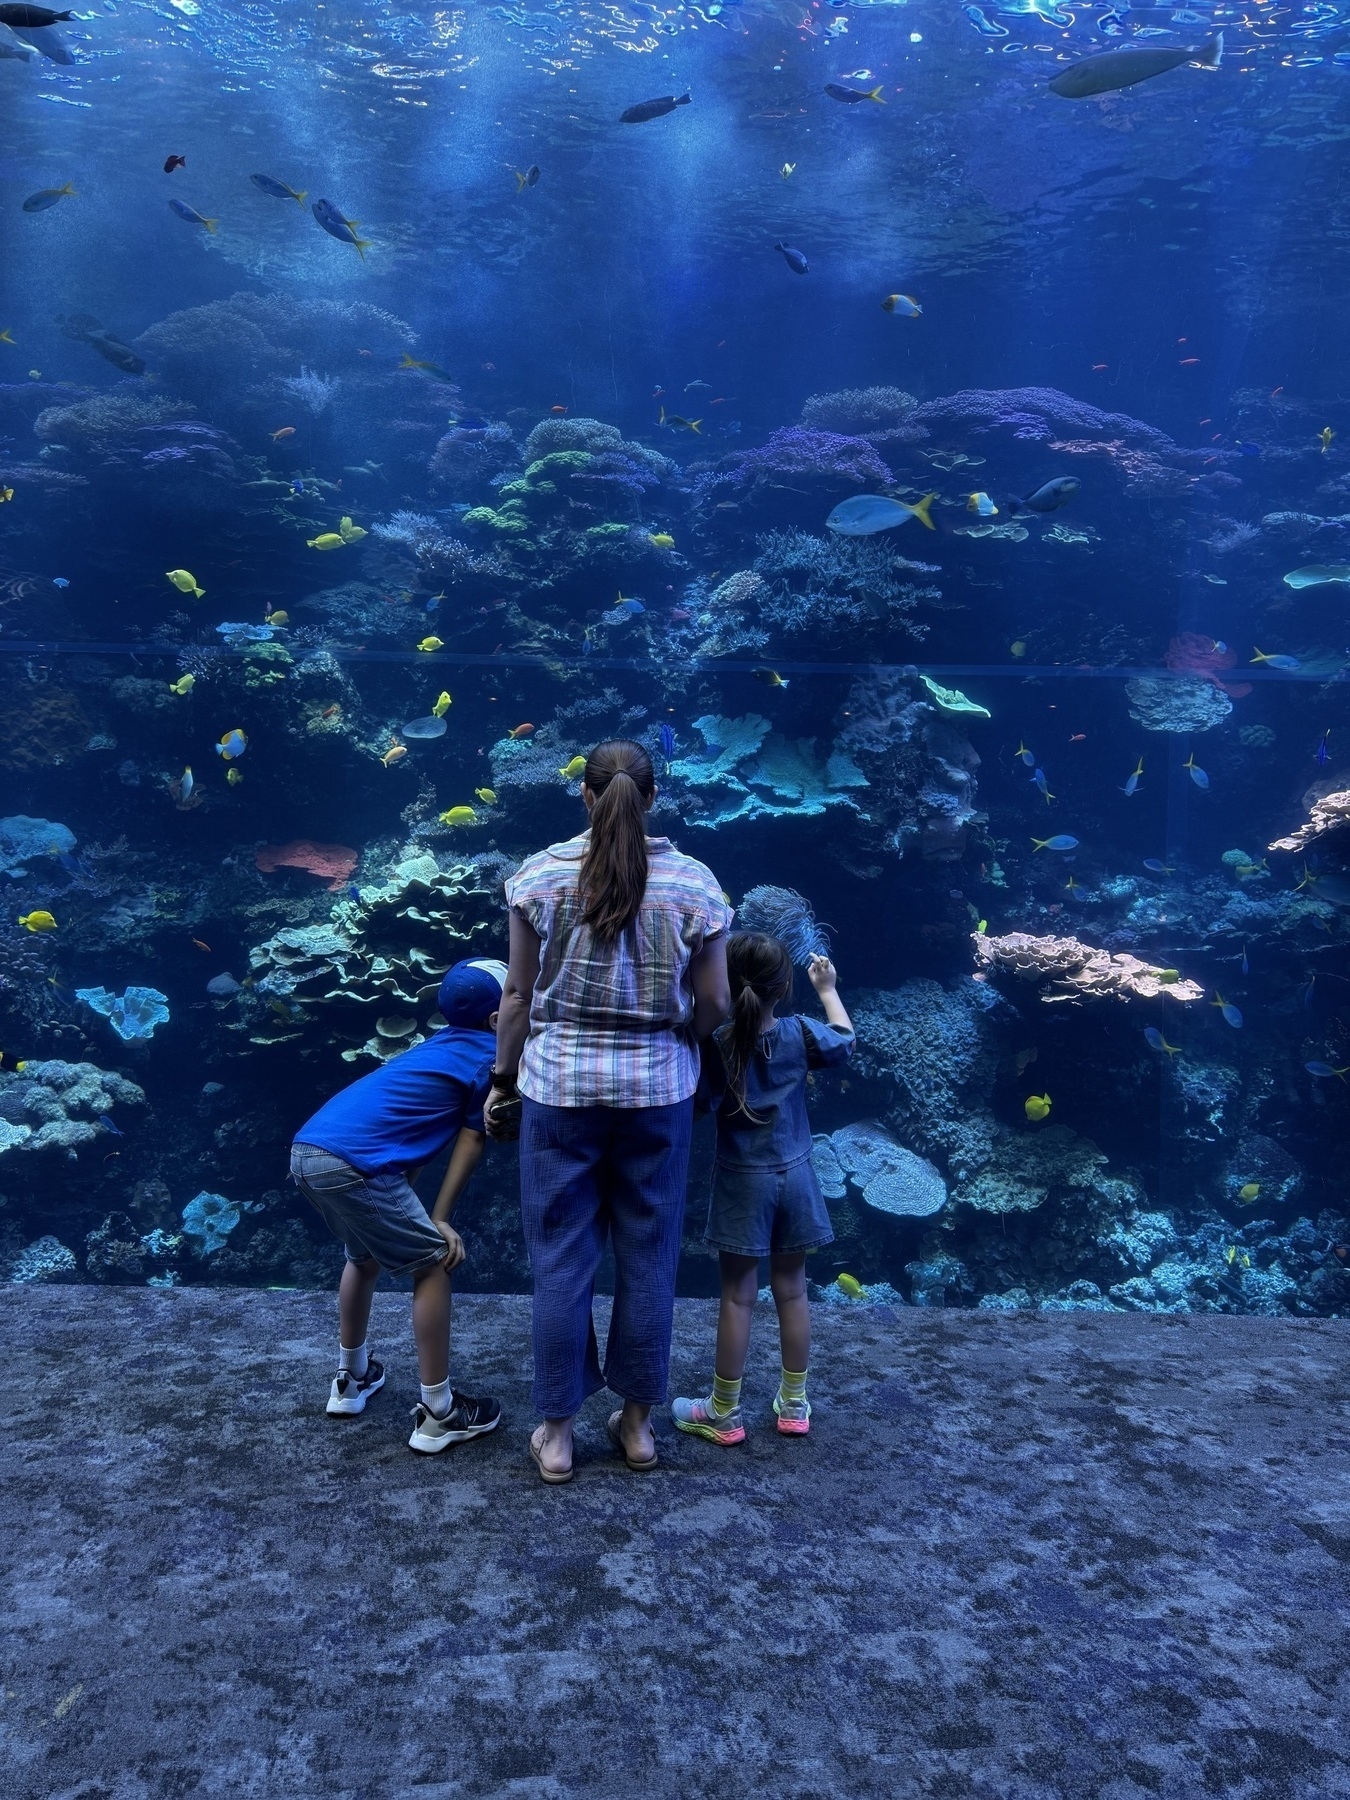
We knew we needed the visit the excellent Georgia Aquarium. We’ve been before in years past, but our daughter was too young to remember. She’s been begging to go and there’s no way we could’ve passed it by. Thanks to Kalena’s research and planning, we knew the perfect time to arrive. We had quite a few of the tanks/exhibits to ourselves before the crowds appeared.
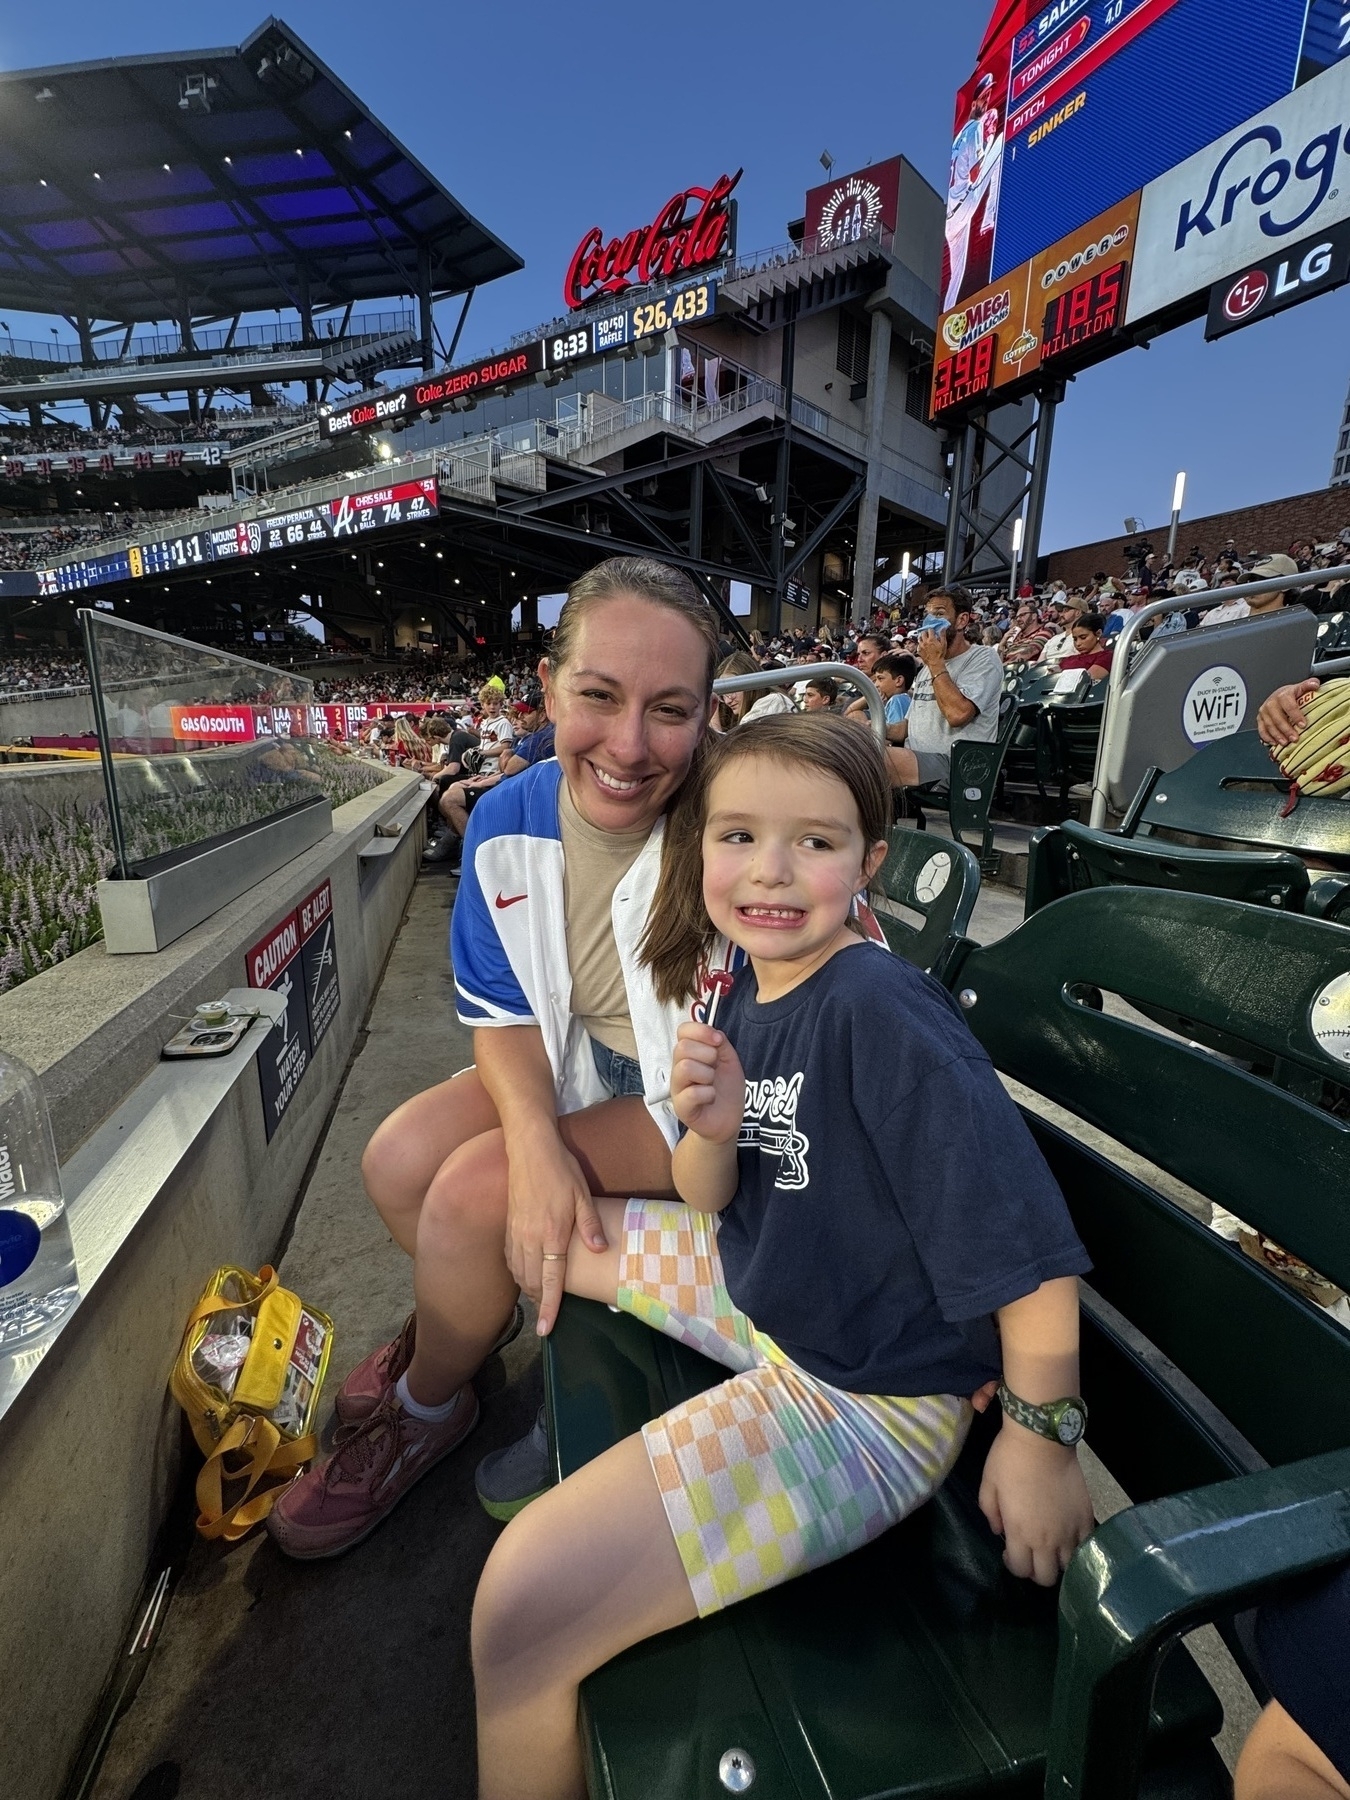
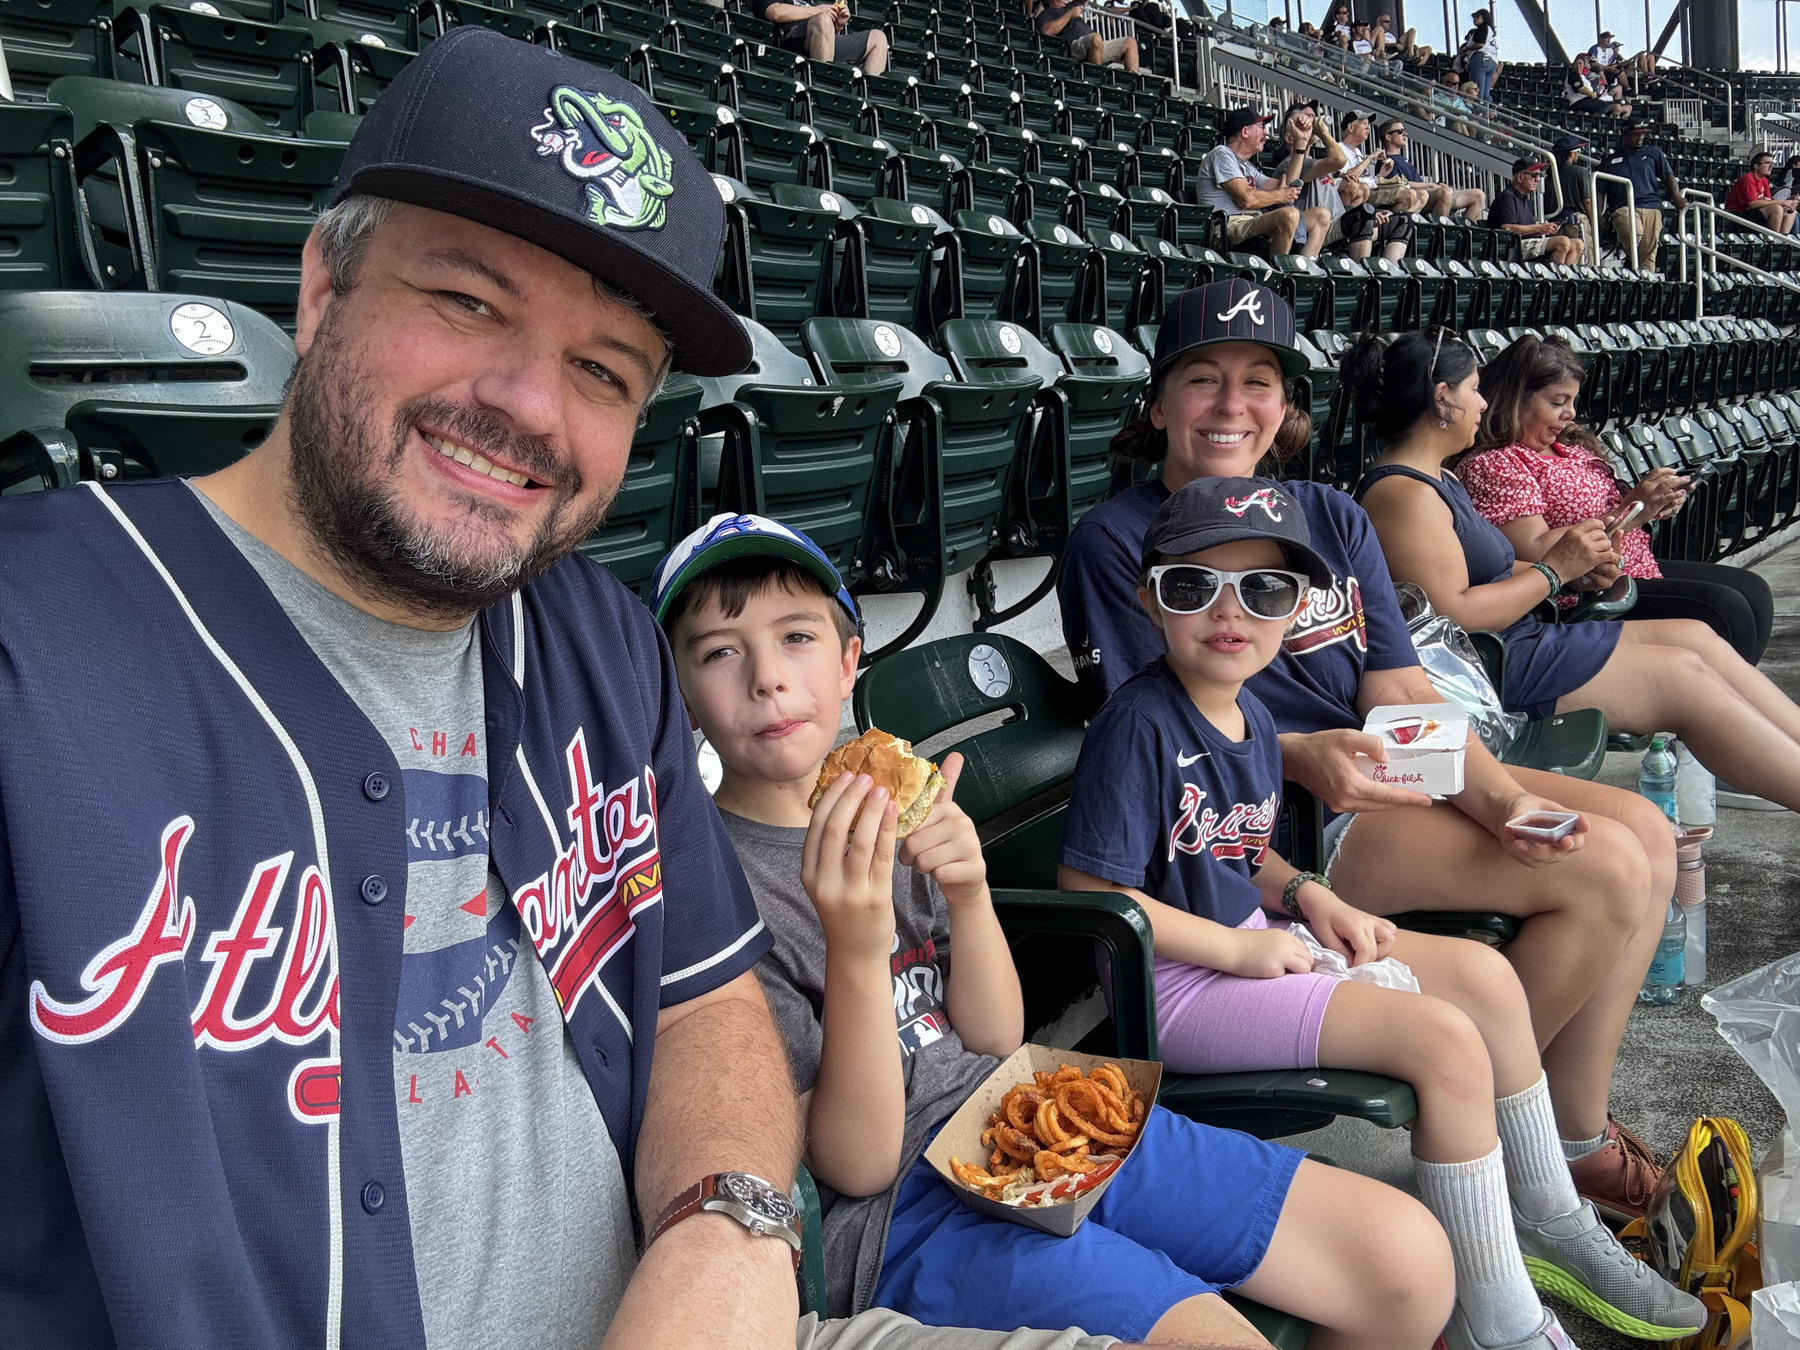
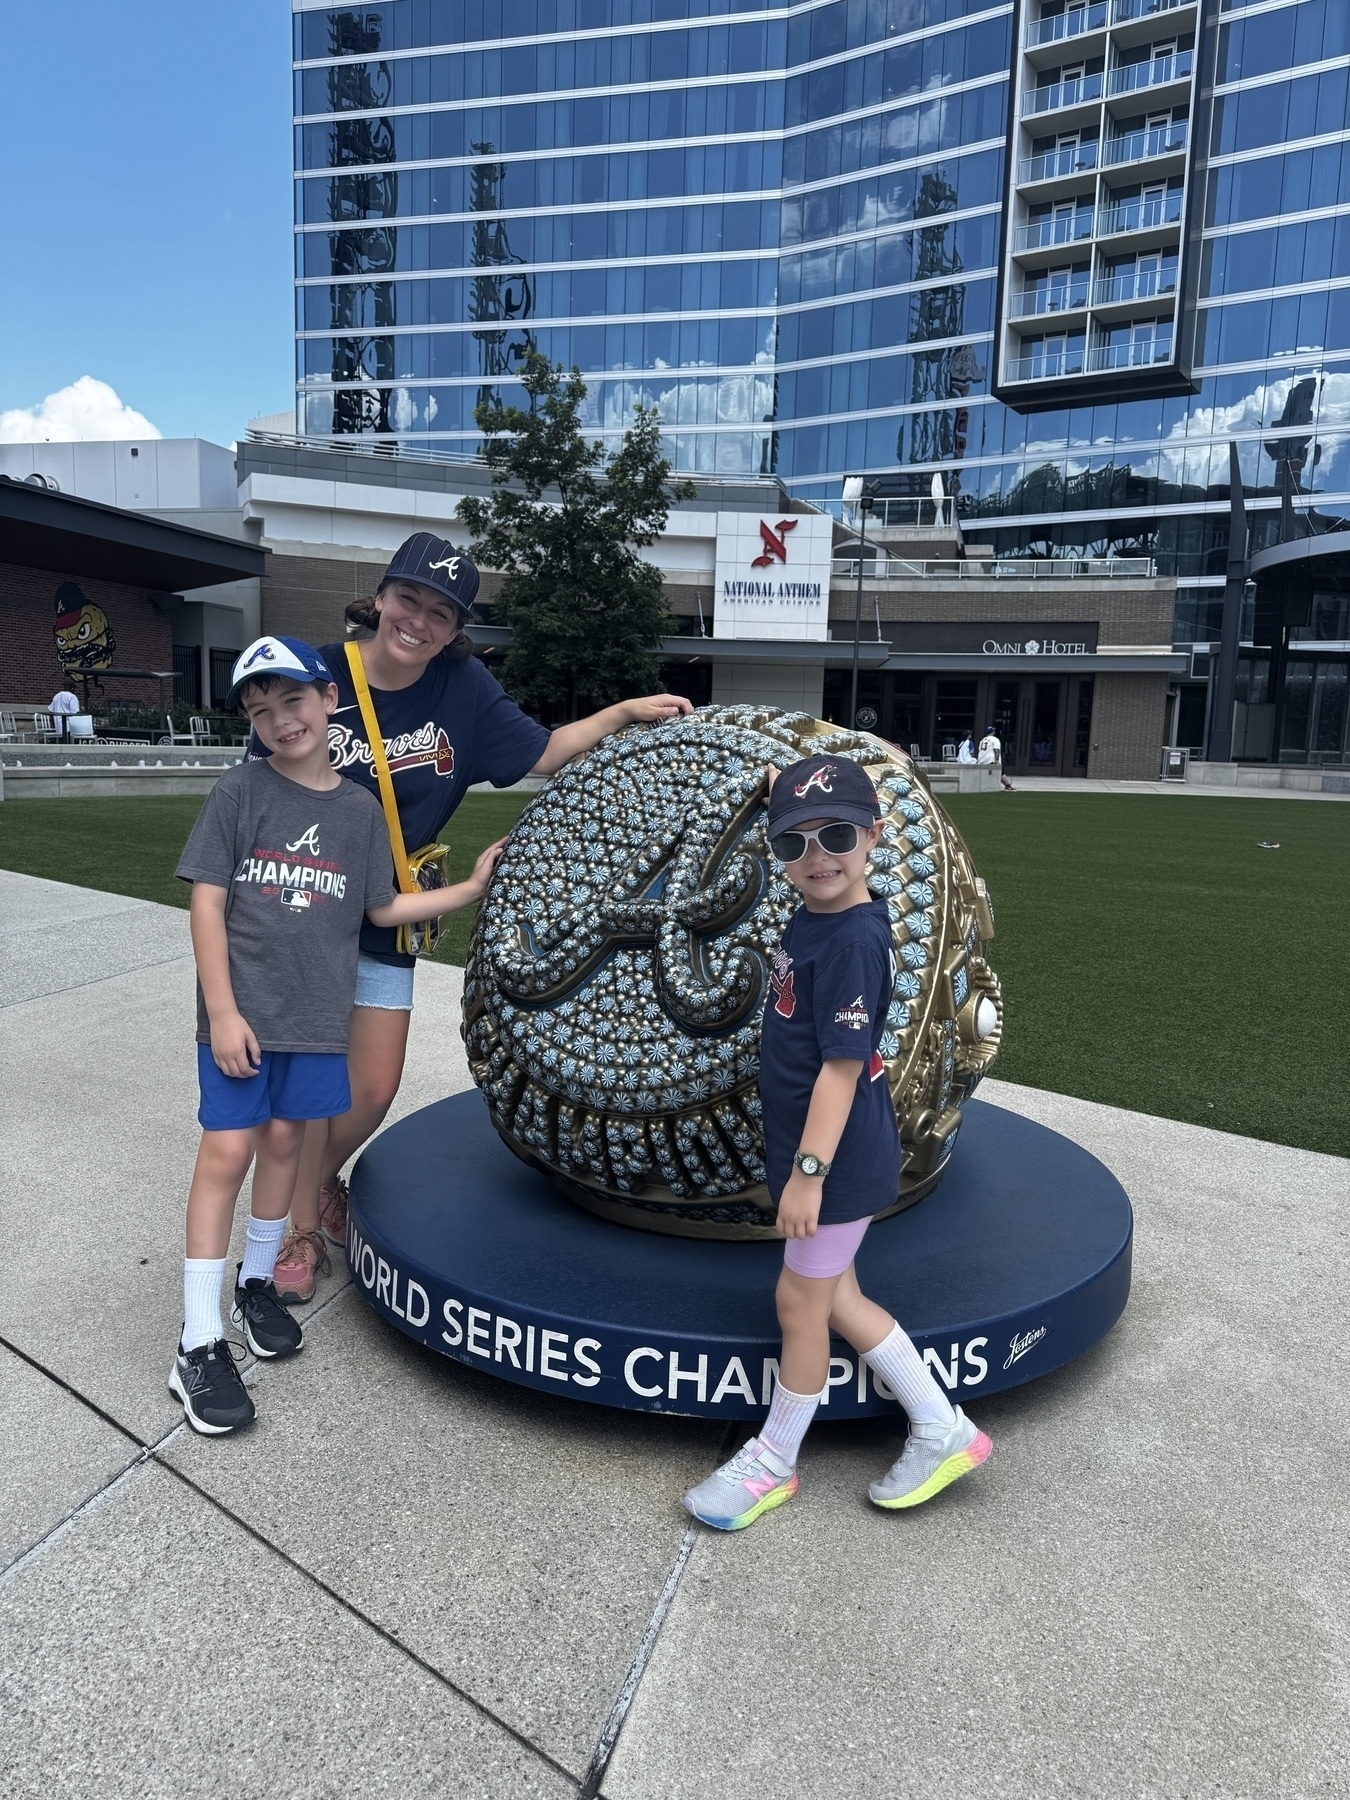
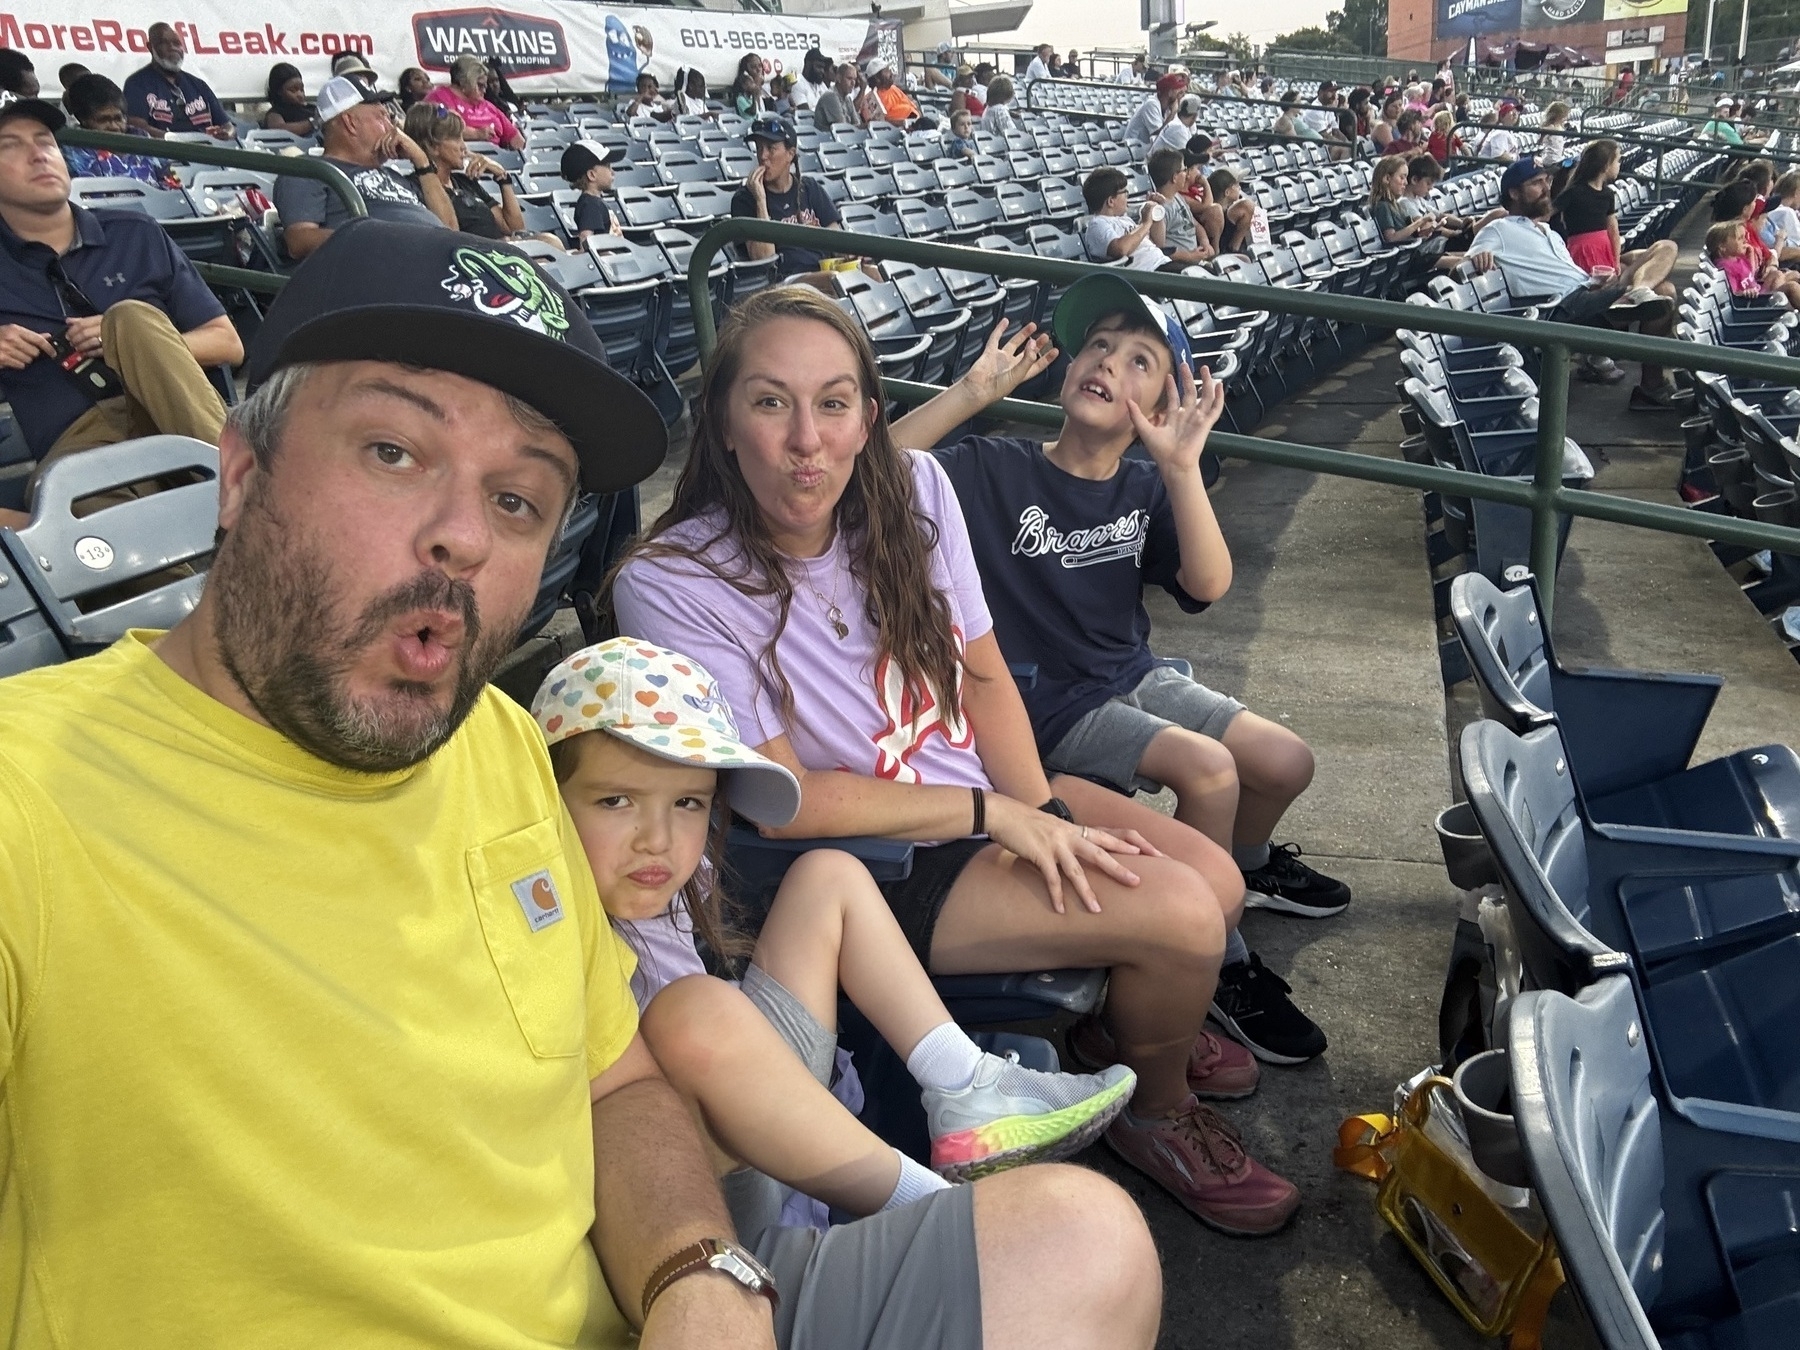
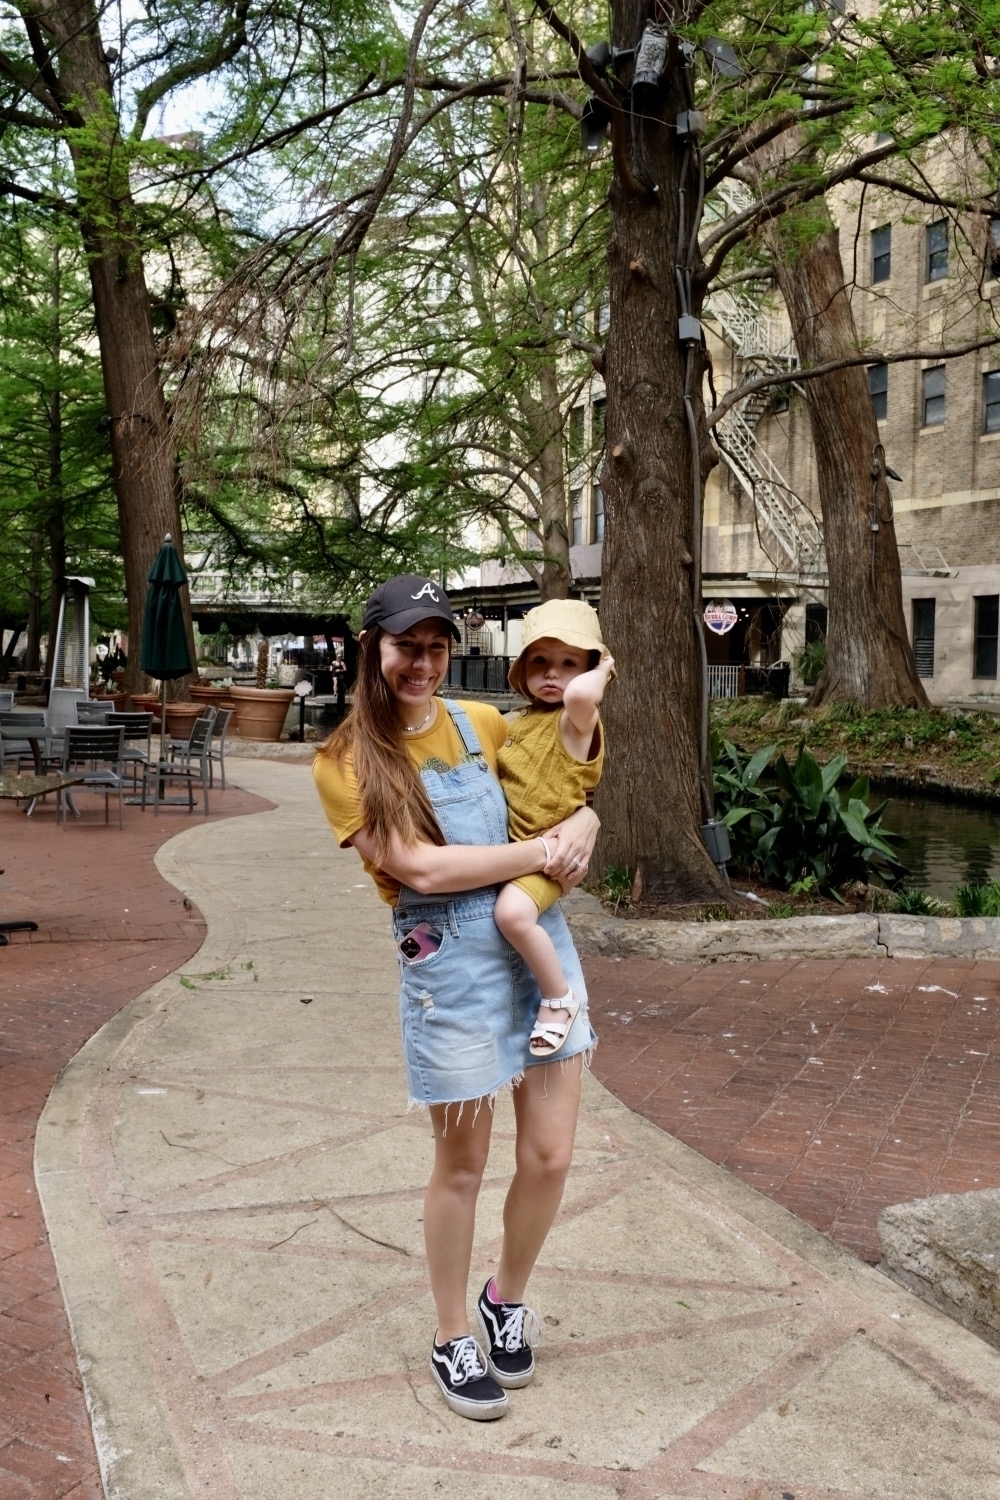
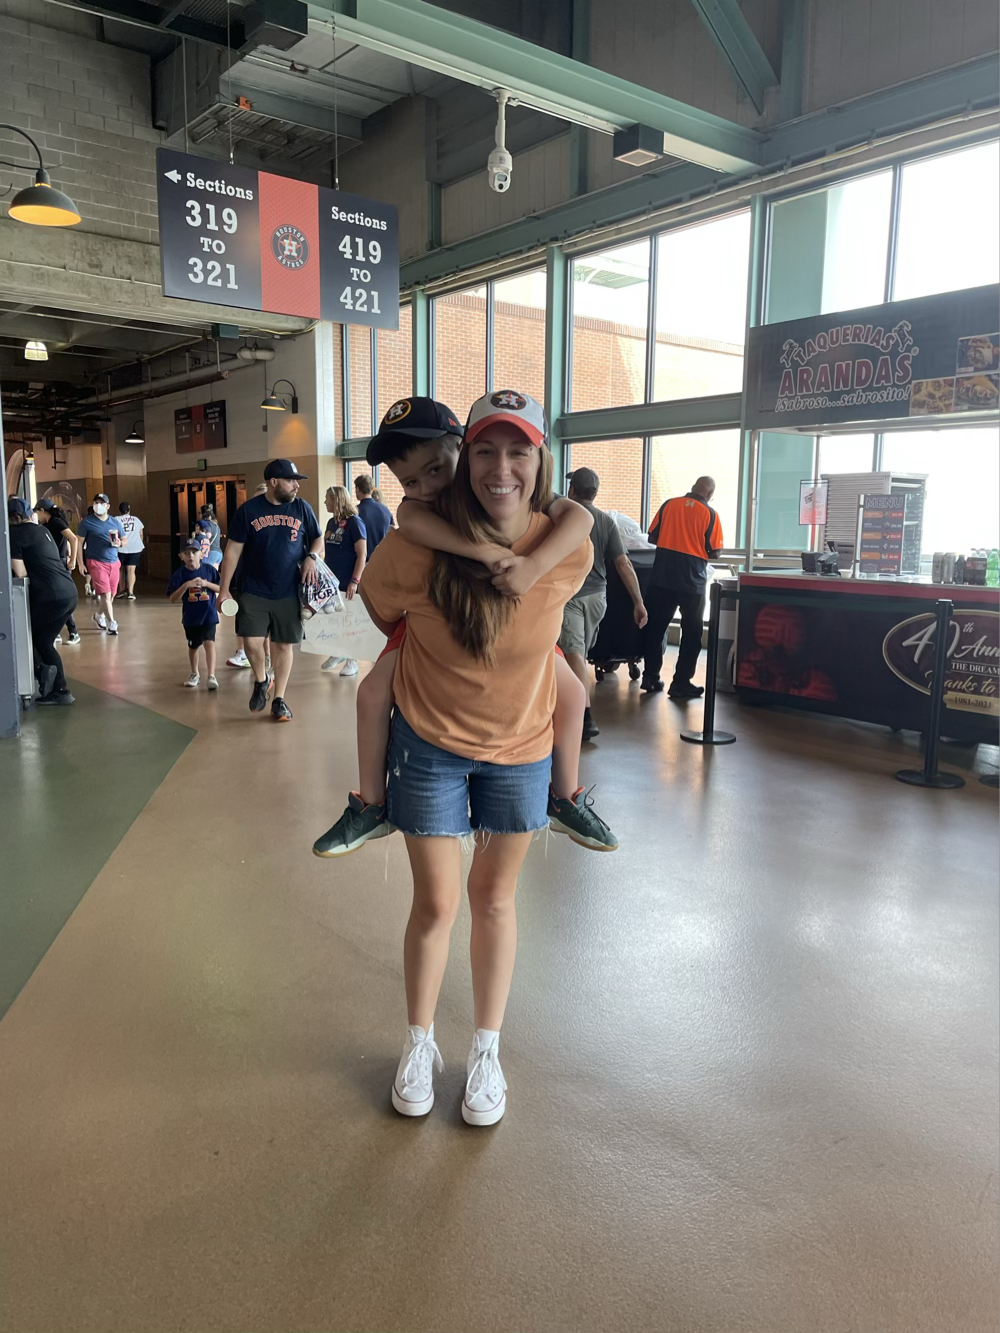
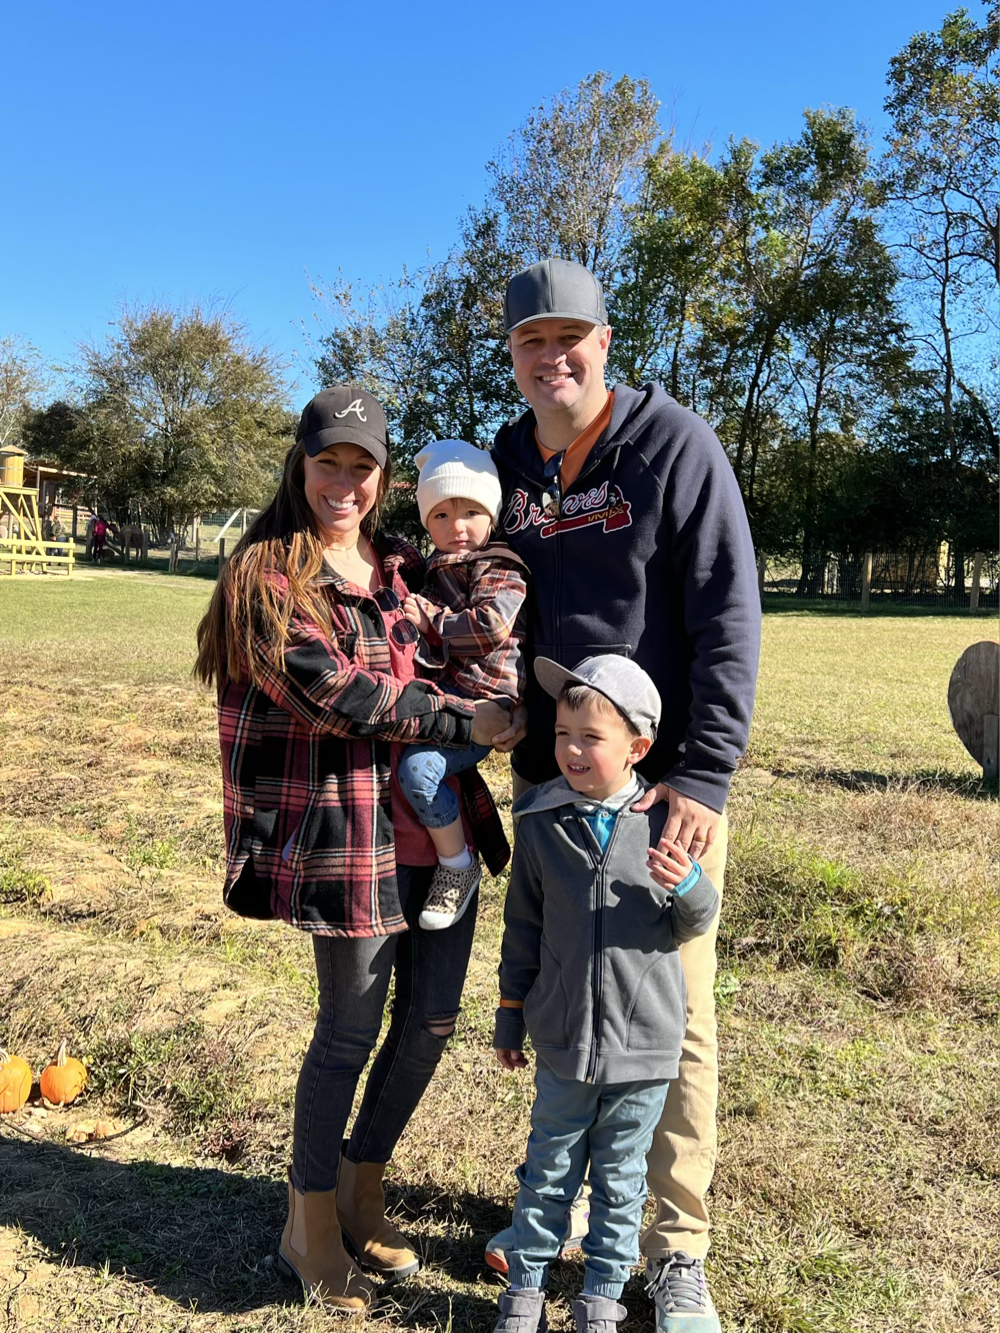
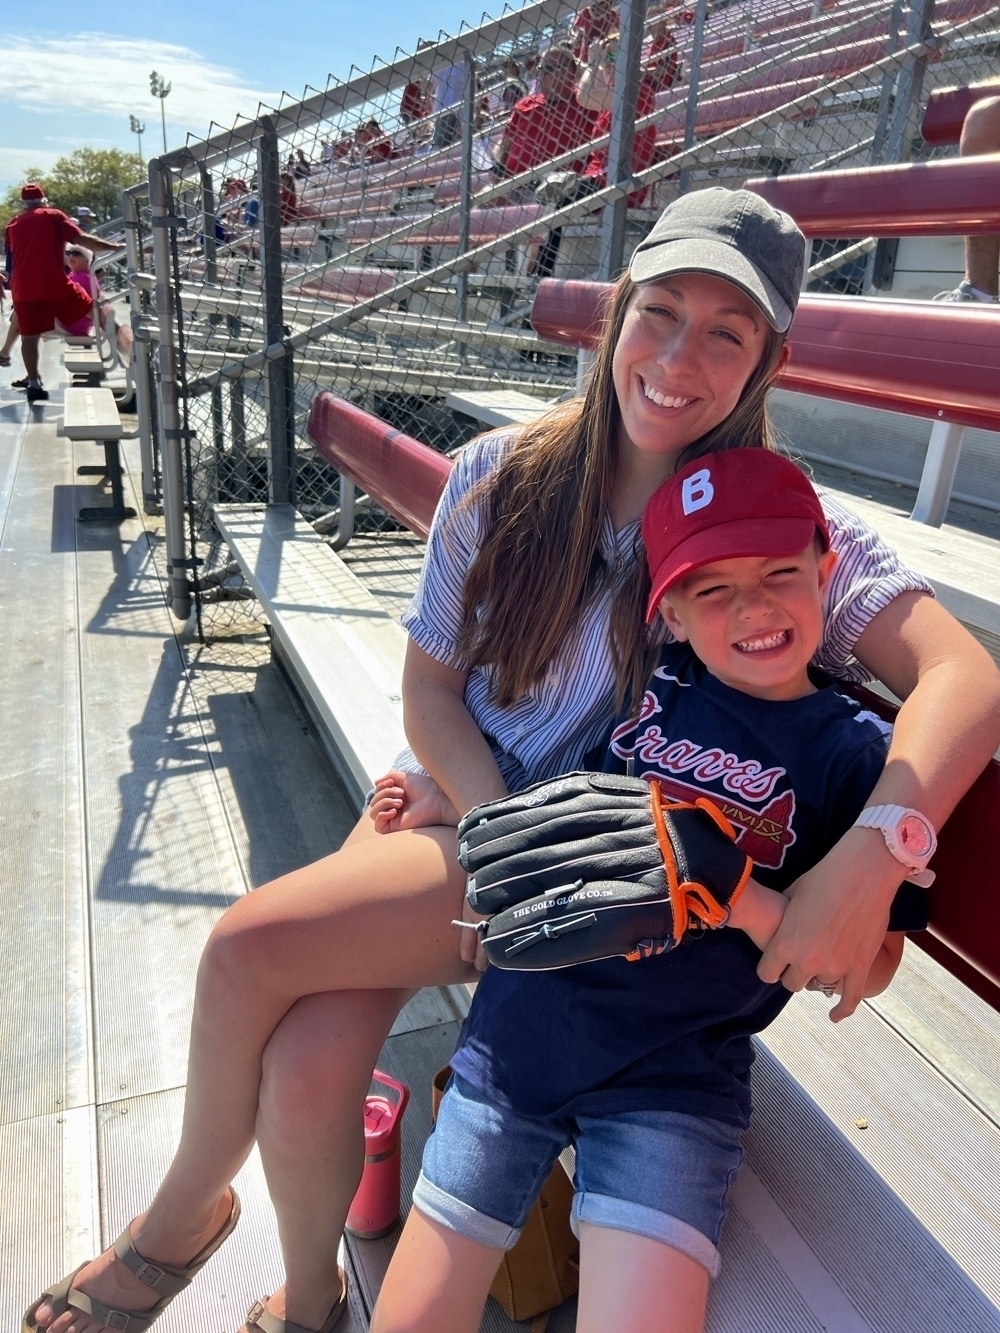
If you know anything about us, you know a trip to Atlanta most likely centers around the Braves. We know the Truist Park/Battery area well and chose a hotel close by. The Braves aren’t currently playing their best ball, but it was nice to take the kids once again (photos at end). We knew where to sit (good views for kids, shady, cost effective) which helps when you’re dealing with Atlanta heat and kids.
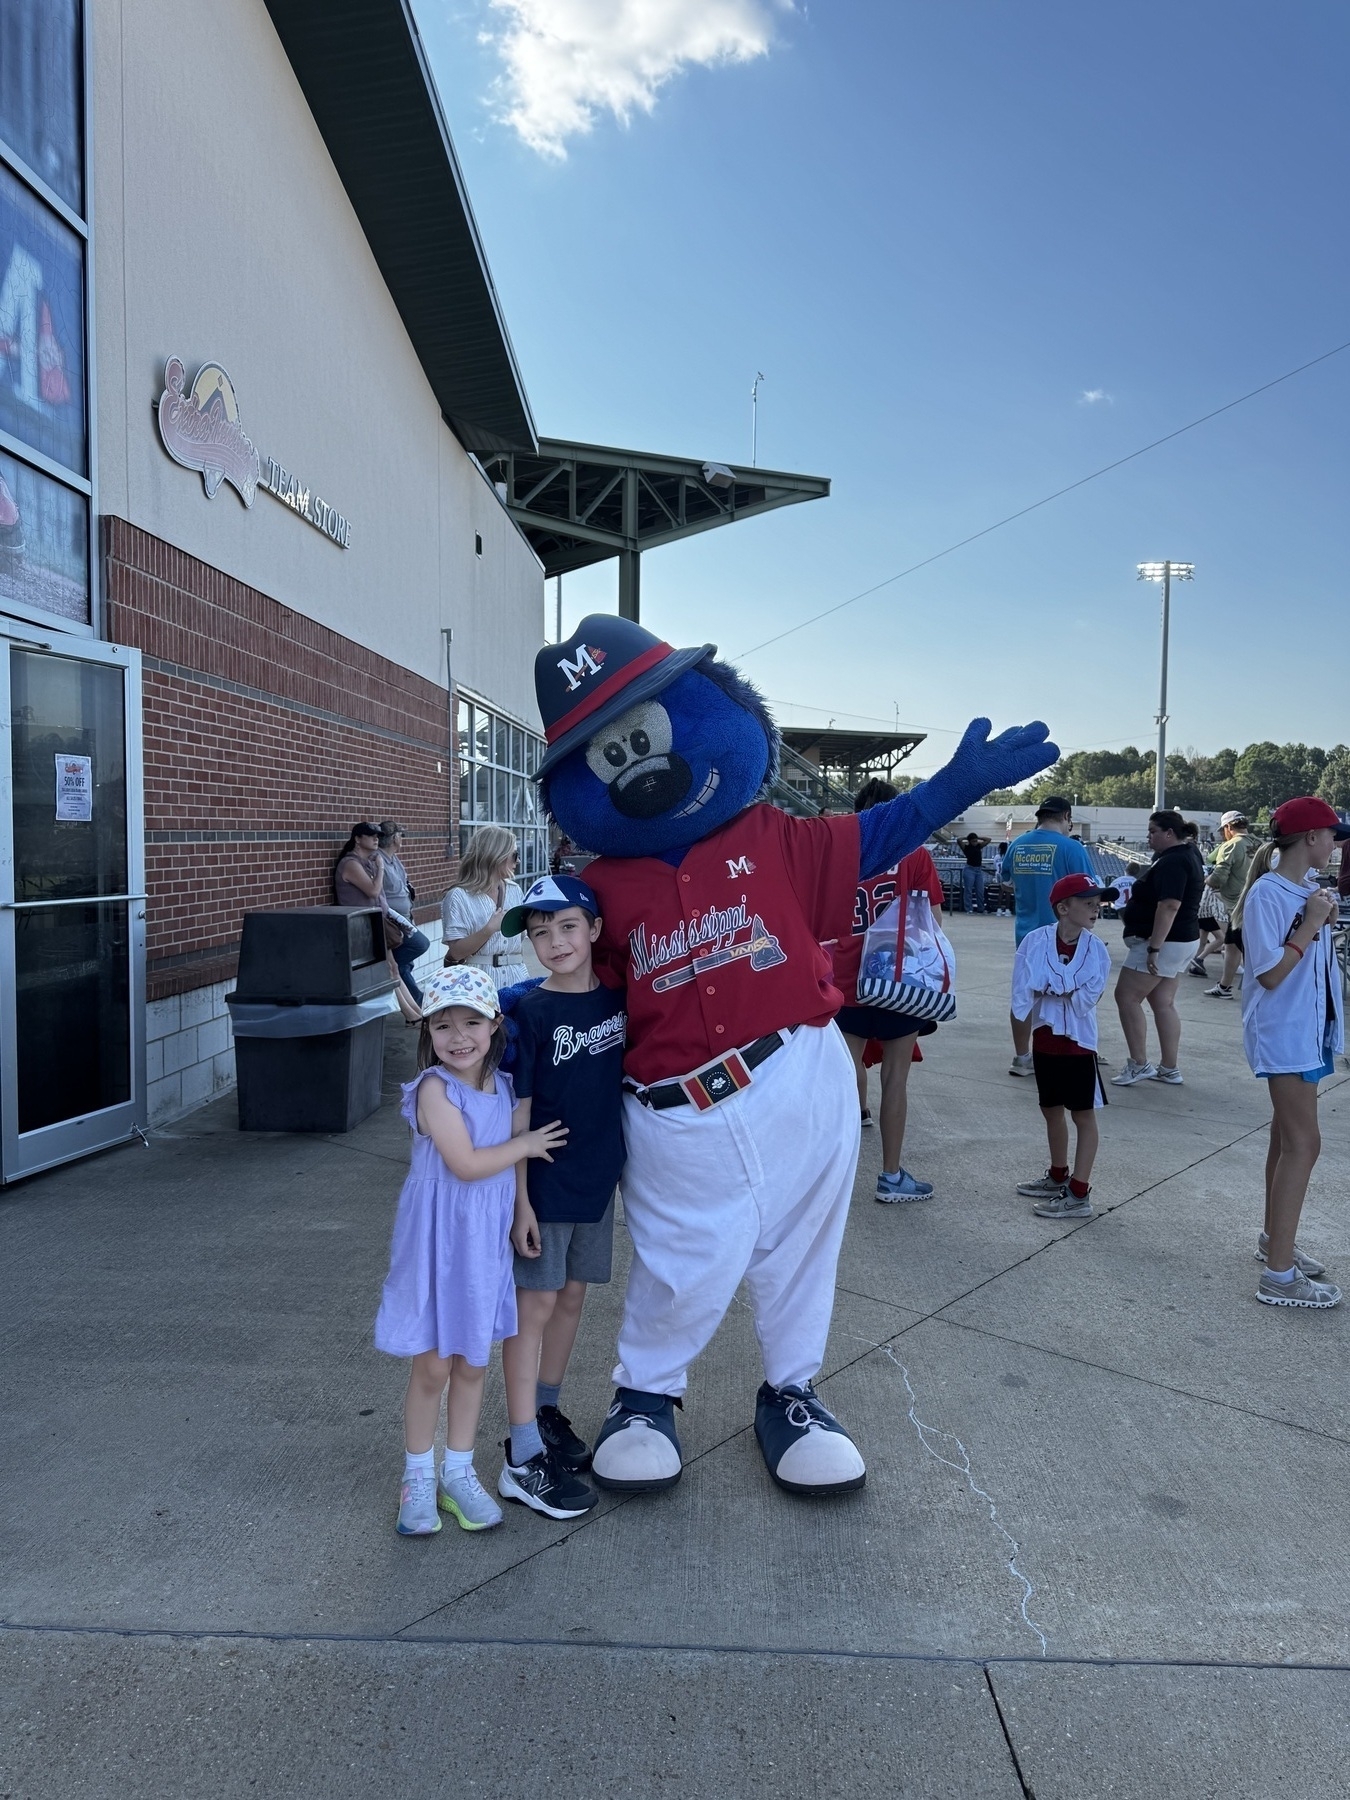
On the way home, we decided to take a different route, this time through Jackson/Pearl, MS. The AA Affiliate (Minor Leagues) of the Braves organization is currently in its final year in the state, and we wanted to catch a game there before they move. Thanks to their version of a going-out-of-business sale, we managed to snag a large amount of goodies (jerseys, hats, shirts, bats, balls, etc). They were also giving away 1,000 jerseys that night. Somehow, we managed to snag numbers 995, 996, 997, and 998 before they ran out.
As with most trips, you get to a point where you’re ready to be home. Fortunately, I’m sitting at our dining room table writing this while the kids are sleeping in their own beds. Normal life starts back up tomorrow, but it was nice to step away for a few days to change things up.
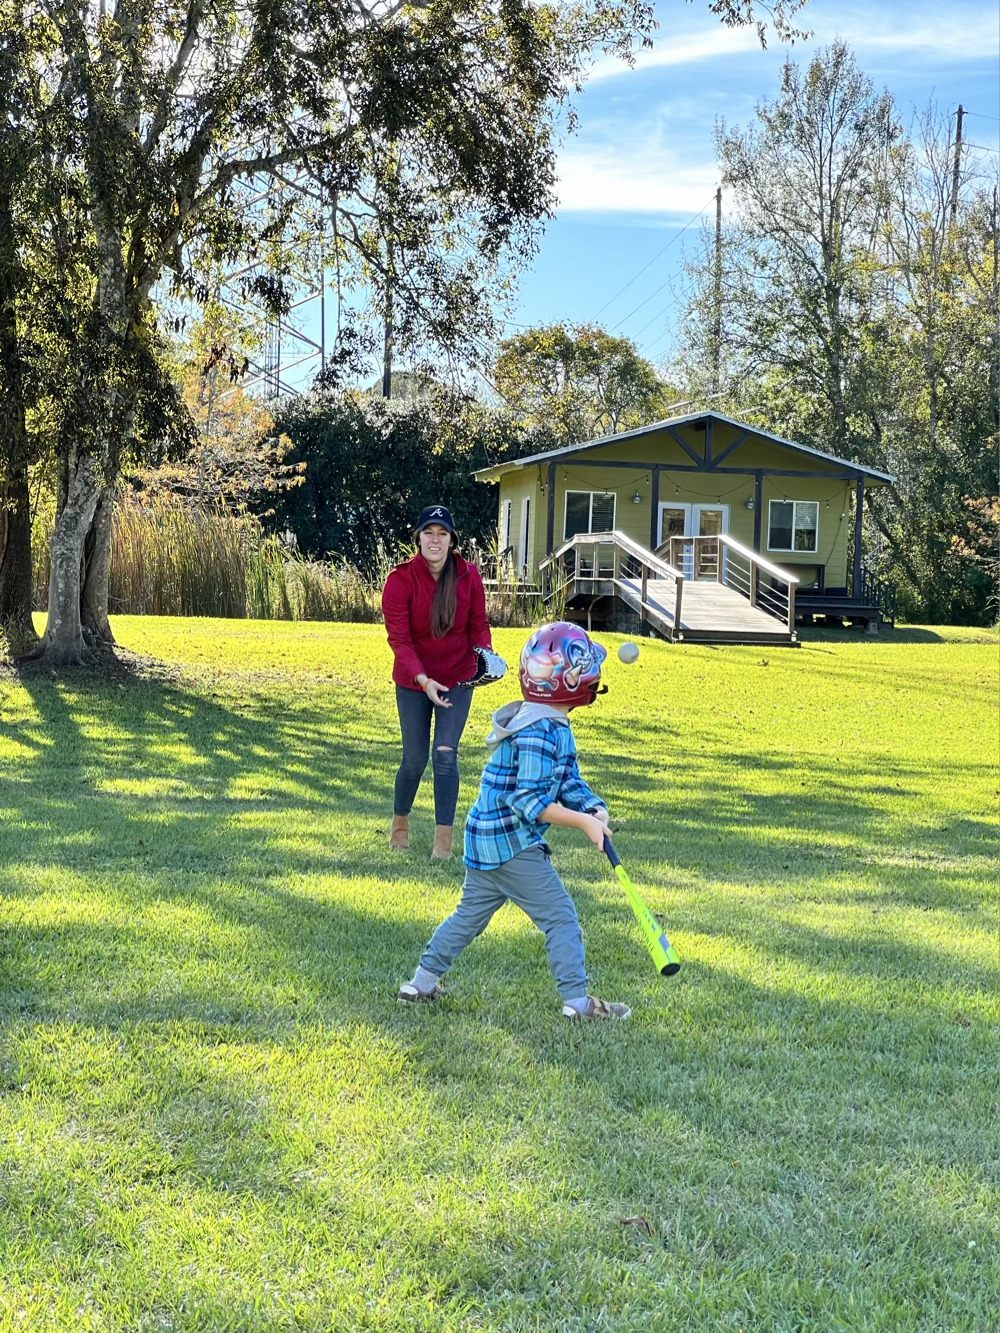
In one photo drop, here are a few of us enjoying some baseball.

Introducing Sumo Theme for Micro.blog
As the developer of Tiny Theme for Micro.blog, I’ve had a unique seat as the platform has grown. As Micro.blog has added features, changed, and matured, so have the many great themes available. The popularity and community acceptance of Tiny Theme has consistently overwhelmed me. It has always been a great theme for people who want high level control over the look, feel, and layout of the site.
Today, I’m excited to introduce a new theme called Sumo. It uses a lot of the codebase of Tiny Theme, supports many of the same features, but is significantly more opinionated than Tiny Theme.
Opinionated?
Using Hugo and Micro.blog, you have the ability to manipulate and mold any theme into what you want. If you have a clear vision of where you want your site to go and the technical chops to get it there, use Tiny Theme.
I designed Tiny Theme with OTHERS in mind. I wanted to make it as flexible and functional as possible. I wanted others to be able to bend it to their liking. And I’ve been amazed at the results.
I designed Sumo Theme with ME in mind. This is a full package theme designed how I’d choose if you paid me and walked away from the computer. But, ya know, it’s free.
It’s Not Customizable?
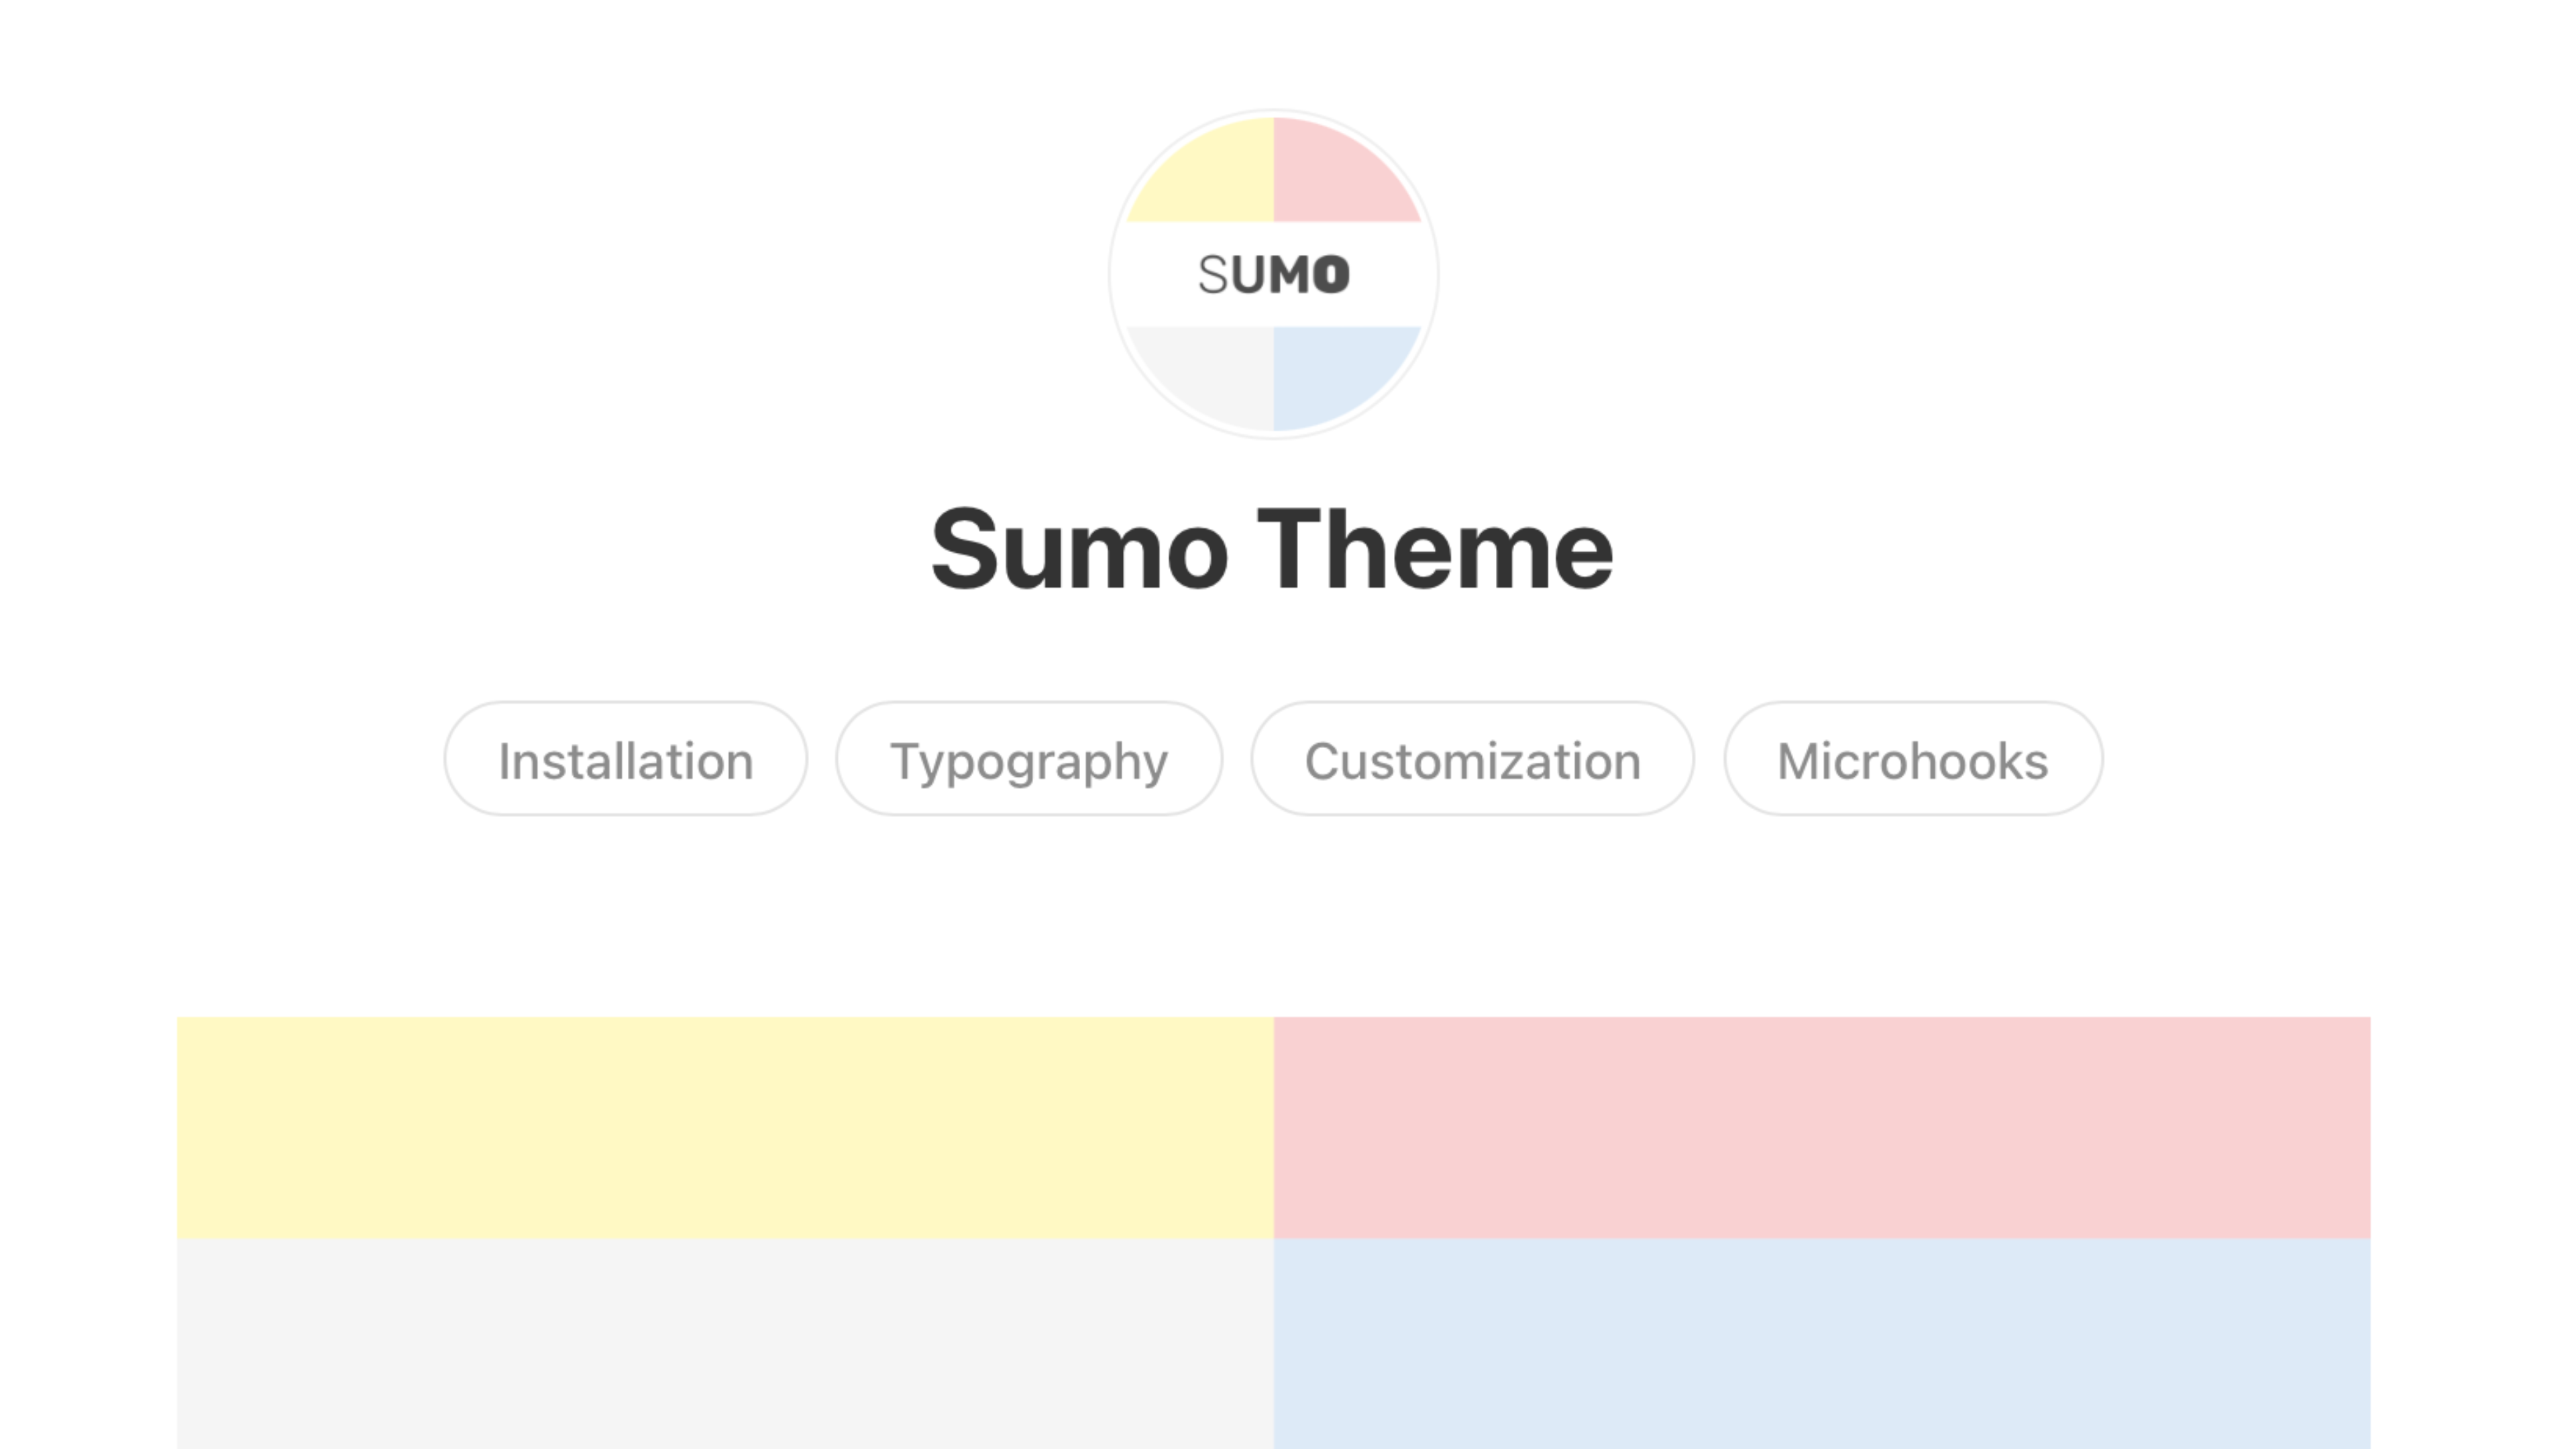
Well, let’s not go that far. Sumo Theme is built with 3 easy customization possibilities.
- Skinning
- Font Choices
- Microhooks
Skinning allows you to choose your own color scheme. I’m not talking about choosing a main color and an accent color and going home. I mean you can color all kinds of stuff using CSS.
Font Choices include all stacks created by Modern Font Stacks. This mirrors the feature on Tiny Theme.
Microhooks were developed for Tiny Theme and adapted for Sumo Theme. Every Microhook works on BOTH themes.
But Can I Do More?
Of course you can, as with all themes available on Micro.blog. You can even fork it on Github if you’d like. However, this theme is not built with that in mind. The ideal user of Sumo Theme will activate it, color it, perhaps use a microhook or 2, and roll with it.
Are There More Features?
Well, of course there are. We could talk about things like speed, codebase, microhooks, font choices, and skinning for hours, but let’s leave those behind for now. Here’s a good old fashioned list of some of the other features available at launch.
- See images (and other elements) full-width on smaller devices
- Support for Tinylytics
- Support for FontAwesome (no scripts or plugins needed)
- Full suite of Typography options such as multiple blockquote styles, multiple paragraph styles, and page folds
- Full comment system support
- Supports popular plugins by default
- Frequently Updated
- Responsive Developer
- And a lot more!
What If I Need Help?
If you need help, have a problem, or would like to report a bug (this is a 1.0 release after all), you can contact me via Micro.blog or email.
Sumo Theme is launching as version 1.0. More features and tweaks are on the roadmap, including a 1.1 release before the middle of August 2024.
How Much Does it Cost?
It’s free, of course. But you can always feel free to chip in to support development.
Episode 2: Kobos, Kindles, and Highlights
Today, I talk about my experience with Kindles (Oasis, Paperwhite) and the Kobo Libra 2. I touch on what I’m currently reading and I take a quick look at a highlighting workflow I recently built (episode 3 will dive more into that).
Links
- Kobo eReaders
- Bonhoeffer: Kindle | Kobo
- Hypothesis
- Readwise
- Obsidian
Auditing Our Non-Profit's Software
I’ve been in charge of auditing my non-profit team’s software use and changing directions where we need. With some software, I have lots of leeway, with others there’s none. But it looks like we’re going to be using this set of products going forward: Quickbooks (existing), ProtonMail (from Google Workspace), DropBox (from Google Drive & Docusign), Notion (existing but consolidating lots of stuff), Todoist (from a white board).
Some of our goals in doing this are increasing privacy & security, modernization, lowering costs, and future proofing. It’s not locked in stone as of yet (still awaiting some communication from a couple of the companies), but it looks to be headed that way.
Tiny Theme 2.7: Fundamental Changes to 'More' Tag Usage
Tiny Theme has been updated to version 2.7 and includes a fundamental change to how posts can be truncated with a Read More tag. Previously, you needed to use a Summary Posts plugin (now archived). The feature is now built-in for all users. Simply add a more tag within your post and it’ll be properly truncated on your main blog page.
That’s hardly breaking news, but here is where things change. Hugo (and thus Micro.blog) has limited support for formatting and handling this style of truncated posts/summaries. Typically, all HTML formatting (links, photos, etc) would be stripped out when using that tag. Obviously, that’s not ideal. Tiny Theme will now handle that how you might expect. Your blog feed, even when using the More tag, will show all HTML as intended on the post feed even when you use more tags.
My Top 5 Flashlights to Carry
For years, I’ve been in what many call the EDC Community. Basically, that means I’m more cognizant of what I carry on a daily basis. Technically speaking, everyone has an EDC (or Every Day Carry). For most people, that includes a phone, keys, and wallet. Others take it a step further with a pocket knife or leaps and bounds further with a fully stocked sling/bag.
One of the most common extra items is a flashlight. If you’re questioning the necessity of carrying a flashlight by asking, “Why not use the flashlight on your phone?” then you likely aren’t the individual who needs to carry a flashlight. But if you find yourself needing a legitimate standalone flashlight often (perhaps due to your job) or just want to see what it’s like to carry one, this list is for you.
A Child Theme for Tiny
Tiny Theme comes fully designed out-of-the-box, but many people like to tweak things here and there. Perhaps you want to add a background or increase the width. As a quick example, I’ve designed a child theme using only 3 lines of CSS.
I’ve added a background color, modified the page width, tweaked the margins, rounded some corners, and centered the header. You can copy and paste the code below into your Custom CSS (access it via the Design page on Micro.blog). Use it as is or modify it to your needs.
As you can see, making wholesale design changes to Tiny Theme is pretty easy.
My Top 10 Historical Fiction Novels
In mostly no particular order. As you can tell, I lean towards WWII, but there are a few exceptions.
New - Tiny Theme 2.0 with Microhooks
I’ve been very happy with the success and development of Tiny Theme since its inception. However, there has always been one big obstacle I’ve had trouble over-coming. Basic CSS customization has always been possible, but I wanted to create a way for more advanced customizations without requiring users to over-write major elements of the theme (and thus missing out on future updates).
Introducing Microhooks
I’m calling this new feature Microhooks. It allows users to add (or modify) elements without having to over-write critical parts of Tiny Theme. For example, previously, if you wanted to add an email subscription box to the bottom of each post, you’d either have to code that in to every post OR completely over-write the single post implementation of Tiny…and if the single post implementation of Tiny ever got updated, well…good luck. Now, there’s another way.
Due to the growing popularity of Tiny Theme, I have created a documentation site that has information more current than this post.
Default Apps for 2023
There have been a bunch of “what apps am I using?” blog posts recently, inspired by an episode of Hemispheric Views. Robb Knight has a page with links to other people’s posts.
A New Plugin for Tiny Theme: Adaptive Photo Layout
When I first created Tiny Theme, I knew I wanted to allow users to create posts with more than a handful of images. While technically possible from day one, the default layout was a simple vertical stack of images. While this is to be expected on mobile devices, it’s less than elegant on larger screens.
The solution comes in the form of the Adaptive Photo Layout plugin for Tiny Theme.
Installation
- Go to the Plugin Page
- Install It
Usage
To create a gallery, you have to follow a few steps manually. This allows you to only use the adaptive photo layout when you’re sure you need it. Here’s the sample code:
<div class="adaptive_photo_layout">
	<ul>
		<li><img src="LINK TO IMAGE 1" alt="IMAGE 1 DESCRIPTION" loading="lazy"></li>
		<li><img src="LINK TO IMAGE 2" alt="IMAGE 2 DESCRIPTION" loading="lazy"></li>
		<li><img src="LINK TO IMAGE 3" alt="IMAGE 3 DESCRIPTION" loading="lazy"></li>
		<li><img src="LINK TO IMAGE 4" alt="IMAGE 4 DESCRIPTION" loading="lazy"></li>
		<li><img src="LINK TO IMAGE 5" alt="IMAGE 5 DESCRIPTION" loading="lazy"></li>
		<li></li>
	</ul>
</div>
The last empty <li></li> is suggested for formatting purposes.
There are no limits to the amount of photos you can use. As long as your code is formatted like the above, it will work. If you’d like, you can even link each image to a standalone version (or to anything else) as well.
Shortcode?
I made the intentional decision to not include a shortcode with this plugin. Shortcodes create longterm lock-in to a plugin. I wanted you to be able to switch themes and plugins in the future without your site breaking or you being required to manually remove every shortcode.
Shortcuts!
Thanks to the excellent work of Jarrod Blundy of HeyDingus.net, this plugin is launching with 2 included Shortcuts for iOS/MacOS.
- Gallery Creator (default gallery creation)
- Gallery Builder (adds ability to add more photos to an existing album)
Both shortcuts require you to validate your Micro.blog account upon initial use. They also give you the opportunity to view and add alt descriptions to each photo in your album. The results are then added to your clipboard. Easily paste the html into your new post/page and publish!
Jarrod did an excellent job with these plugins. Checkout his library for more shortcuts. Best of all, you can even hire him to create one for you.
Support Development
Tiny Theme and its plugins are provided free of charge to Micro.blog users. I do not receive payment from Micro.blog in any way. If you’d like to help offset expenses and ensure the future of Tiny and its plugins, please consider supporting its development.

Example
With the Adaptive Photo Layout plugin, you can create albums that look great on desktop and tablet browsers. For this example, I used the iOS shortcut.


Introducing Font Choices for Tiny Theme
When I started developing Tiny Theme, I set out with goals of (1) accomplishing everything without scripts, (2) make it as light as possible, and (3) use as few media queries as possible. To date, Tiny still has zero added scripts, is very light, and uses only 1 media query (to enable dark mode). However, shortly after releasing the theme, it became apparent that people wanted font choices. How could I enable that without adding any scripts or additional weight to the theme?
Going this route limited me to using system fonts. My first inclination was to leave the theme as is and allow users to decide if and how they wanted to customize font stacks (something you can still do). But with more requests, I realized a lot of people would prefer to have built-in options.
While attempting to build out my own capable font stacks, I came across Modern Font Stacks. It is a collection of pre-defined font stacks (with fallbacks) that have almost perfect cross compatibility with different browsers and systems. It was an easy choice to build off their work.
The next hurdle was deciding how to allow Tiny Theme users to select fonts. I could build in a sort of font selector dropdown, but that would require a settings page (which has certain Micro.blog hurdles) that could stand in the way of future updates. I also considered a separate plugin to enable the feature, but decided that was unnecessary.
Subscribe
Signup to receive digest emails on Monday mornings in your inbox. Optionally, you can also subscribe via RSS.
Ultimately, I decided to integrate the font family choices directly into Tiny Theme. You can use Micro.blog’s built-in Custom CSS options to choose your preferred font stack from Modern Font Stacks. Visit their site for quick visual aids.
How to Use
(Requires Tiny Theme 1.8 or higher)
- Go to
Edit CSSin your Micro.blog Design Settings - Add the following code:
body {
    font-family: var(--font_system_ui);
}
The code snippet above is the default setting. To change your font stack, you can choose from the following options:
- --font_system_ui
- --font_transitional
- --font_old_style
- --font_humanist
- --font_geometric_humanist
- --font_classical_humanist
- --font_neo_grotesque
- --font_monospace_slap_serif
- --font_monospace_code
- --font_industrial
- --font_rounded_sans
- --font_slab_serif
- --font_antique
- --font_didone
- --font_handwritten
For example, you could use:
body {
    font-family: var(--font_old_style);
}
If you’re familiar with web inspectors, you can easily cycle through the options to see a live preview on your site.
Target Specifics
The above example will change the fonts used on the entire site, but you may also prefer to target certain elements. This can easily be done in a very similar way. Let’s say you’d like to only change the font for Headers, here’s how:
h1, h2, h3, h4, h5, h6 {
    font-family: var(--font_industrial);
}
Dealing with Font Weights
Some fonts have heavier and lighter weights by default. If you like a certain font choice, but think the implementation is too light or too heavy/bold, you can experiment with different weights. Modern Font Stacks gives you your options, but here’s an example specific to Tiny Theme.
body {
    font-family: var(--font_antique);
    font-weight: 100;
}
Backwards Compatibility
If you’ve previously changed your font in another way, this won’t break it. It’s only a simpler way to switch fonts to pre-defined stacks for those who want it.
My Safari Extensions in 2023
Here’s a quick rundown of the Safari Extensions I keep enabled on my devices (iOS, iPadOS, and MacOS).
Wipr
For ad blocking, many people go with 1Blocker, but I prefer Wipr. It’s a no nonsense, install it, and forget it app. 1Blocker is a fantastic app that allows almost limitless customizations and settings. Wipr is a fantastic app that has no customizations or settings. There’s a place for both, but Wipr wins for me.
Baking Soda and Vinegar
Baking Soda and Vinegar are made by the same developer. Together, they change almost every video embed across the internet to use your device’s native video player. This means things like Picture-in-Picture are always available.
Stop the Madness
Stop the Madness essentially fixes broken sites and common annoyances across the internet. See full links instead of shortened URLs, hide banners on common sites, enables autocomplete on sites that have it turned off, stop link trackers, stop videos from auto-playing, and so much more. You can choose settings globally or per site.
There are other apps on my devices that have extensions available, but I have all of those disabled. In addition to Wipr, I use a paid NextDNS account for ad blocking and privacy.
How to Change the Color Scheme in Tiny Theme
I’ve been pleasantly surprised by the number of people who have chosen Tiny Theme for their micro.blog. It is built to be both simple and customizable. One of the most common changes to make to the theme is a change in color scheme.
Where Have I Been
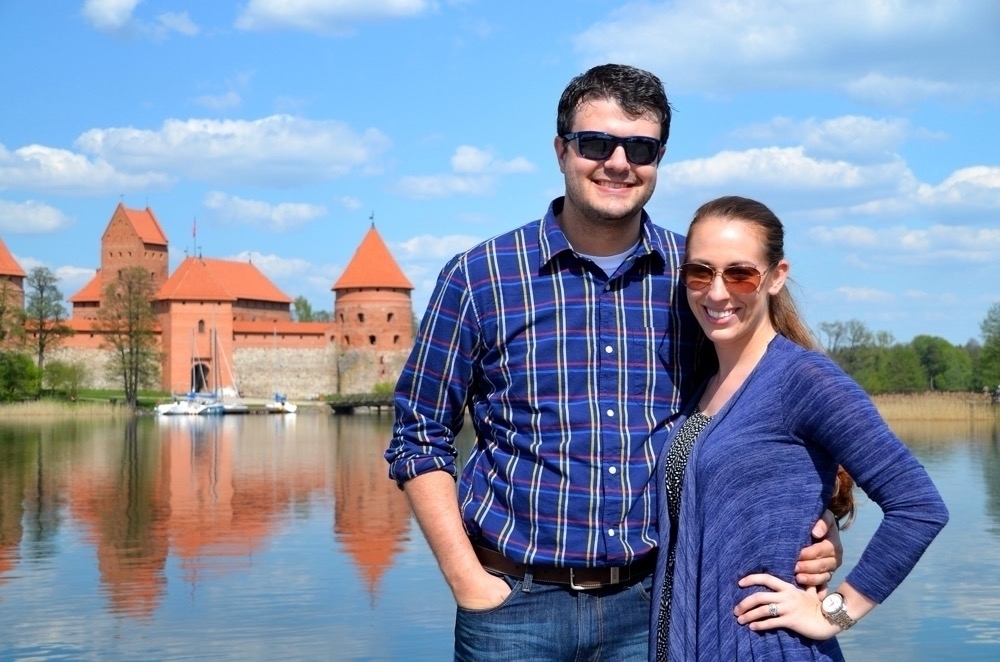
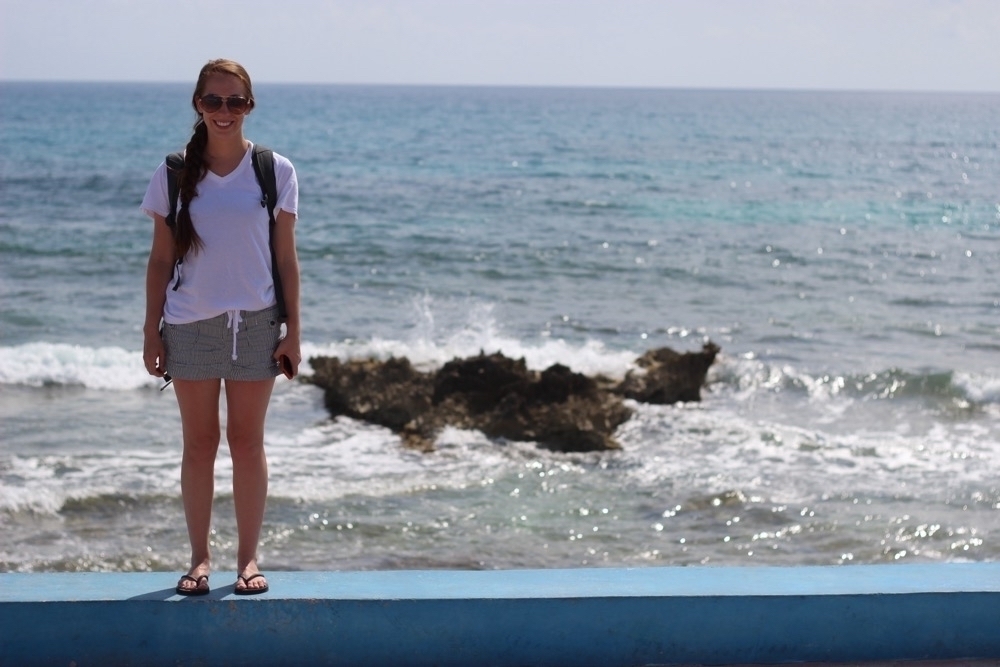
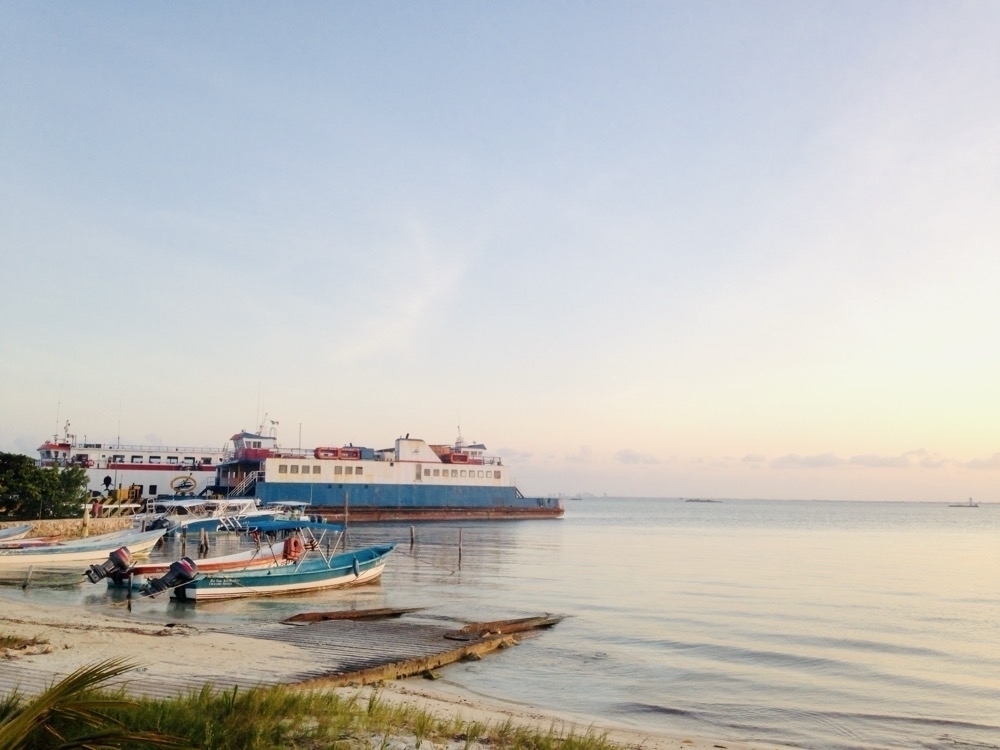
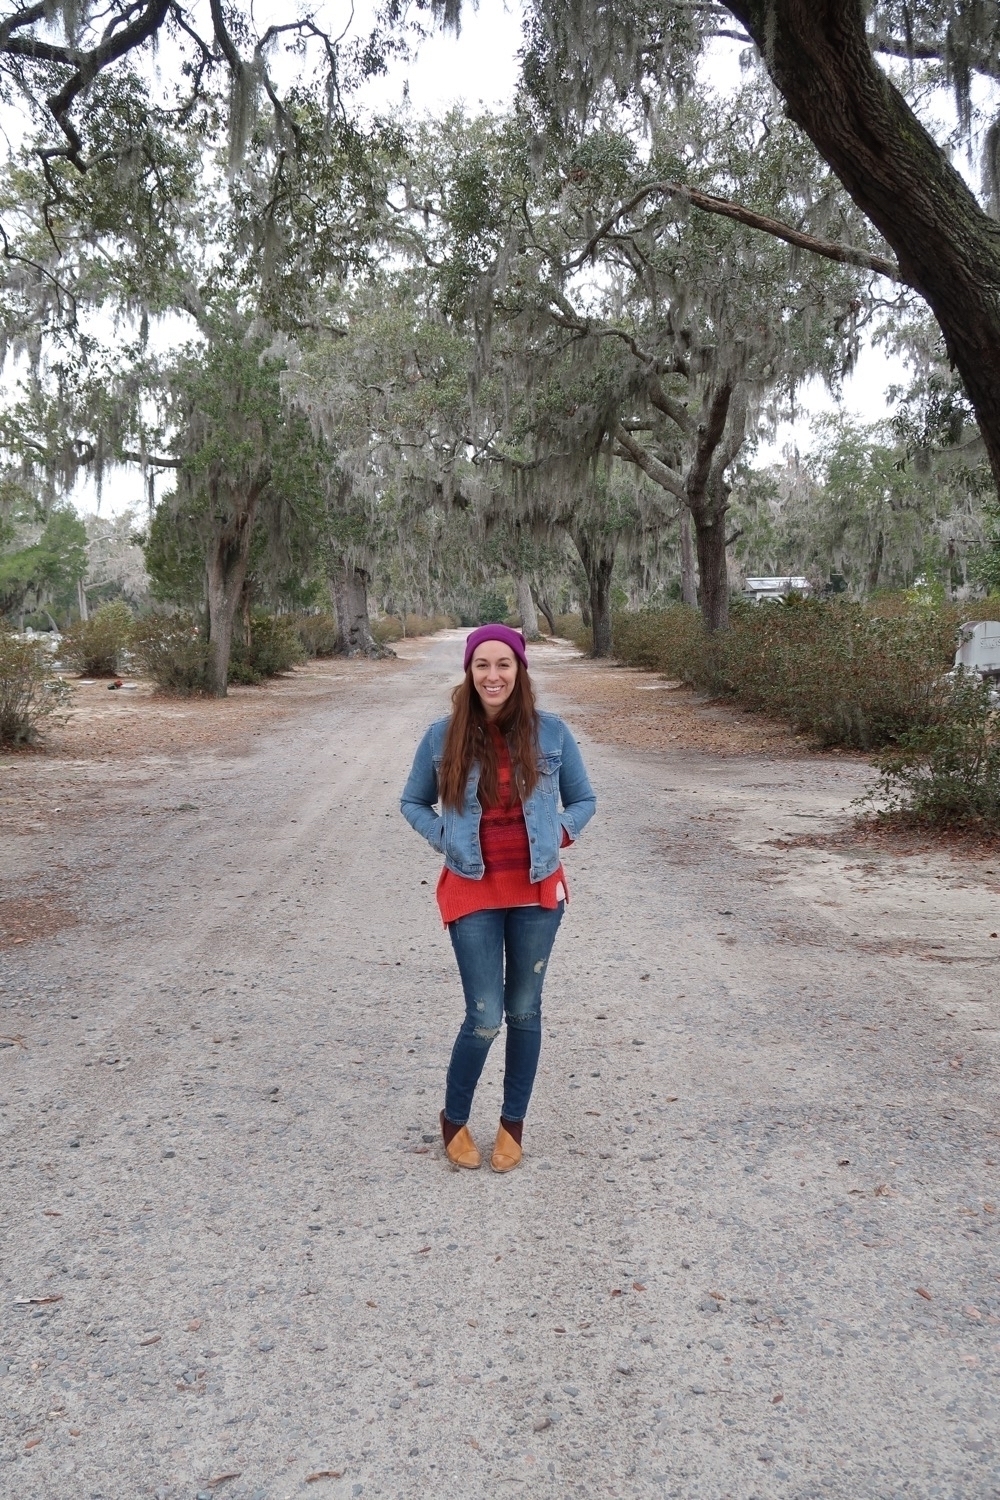
I decided to jump on the trend of listing places visited. For my list, I’m limiting it to locations where I spent meaningful time (ex. no airport only stops).
Countries
- United States of America 🇺🇸
- Mexico 🇲🇽
- El Salvador 🇸🇻
- Honduras 🇭🇳
- Jamaica 🇯🇲
- Cayman Islands 🇰🇾
- Lithuania 🇱🇹
- Latvia 🇱🇻
- Belarus 🇧🇾
States within the USA
- Louisiana
- Texas
- Mississippi
- Alabama
- Florida
- Missouri
- Arkansas
- Oklahoma
- Colorado
- Utah
- Arizona
- Nevada
- California
- Georgia
- Tennessee
- Kentucky
- South Carolina
- North Carolina
- Wisconsin
- New York
- Massachusetts
- Maryland
- Virginia
- Hawaii
- Illinois
- Kentucky
- Washington D.C. (not a state)
I’ve spent way more time than I care to admit in Frankfurt, Germany (Interpol mixup, for real); London, England; and Seattle, Washington (USA). But they were all limited to airport adventures.